Modifications to the GB-4000 for use with the PA2 Amplifier
First posted 05 November 2013
The GB-4000 frequency generator is an extremely high-quality research instrument designed to be used as a stand-alone instrument or in conjunction with the SR-4 amplifier or the MOPA plasma tube driver system. When the GB-4000 is used for the functions for which it was designed, it performs admirably, giving good and reliable service.
Some researchers are using their GB-4000 to drive a PA2 amplifier and a larger plasma tube than the MOPA system will support. In most cases, there are no problems, but there have been some reported cases of severe RF feedback that happens between the plasma tube and the GB-4000. This feedback usually shows up as instability or unwanted flickering of the plasma tube, erratic readings on the DC ammeter in the drain power supply of the PA2 amplifier, and a considerable amount of unwanted and off frequency signals appearing along with the modulating square wave. These unwanted radio frequency signals are only detected if you have an oscilloscope attached to the output of the PA2 amplifier.
These unwanted frequencies cause several problems, such as increased average power dissipation in the plasma tube, and increased heating and occasional destruction of the MOSFETs in the PA2 amplifier. Because these unwanted feedback frequencies are not centered directly on the desired 3.1 MHz carrier frequency, they cause extremely high voltage spikes to appear in the drain tank circuit of the PA2 amplifier. These high voltages can quickly destroy the output stage MOSFET, causing it to fail in a dead short circuit condition. The symptoms of this failure when using the PA2 with a power supply made from several laptop power adapters are that the DC power supply voltage drops to zero and the plasma tube fails to light. If the system is using a "brute force" transformer power supply, this failure may result in the explosive decomposition of the MOSFET.
Replacing the MOSFET restores operation of the system, but often for only a very short time before the replacement MOSFET fails again. The problem is made worse when the GB-4000 is used in the presence of larger plasma tubes, such as the Bill Cheb SSQ-ST or the SSQ-BAT. When using these tubes, the RF field surrounding the plasma tube is almost certainly strong enough to cause the GB-4000 to have instability problems. These feedback problems have appeared regardless of the separation distance between the plasma tube and the GB-4000.
It was found that the cause of the RF feedback problem is the high sensitivity of the output amplifier stage in the GB-4000, combined with a lack of internal RF shielding in the GB-4000. Note that this interference problem only appears when the GB-4000 is used in the RF MODE. The RF feedback problem will not happen when the GB-4000 is used with the MOPA system because the GB-4000 is then used in AUDIO MODE.
Please be aware that the lack of internal RF shielding and the RF feedback problem does NOT indicate any deficiency in the design or construction of the GB-4000. It is a well-designed and built professional instrument, which performs exactly as advertised when used according to the manufacturers directions. The RF feedback situation will only occur when the instrument is used outside of it's normal design envelope, such as happens when driving the PA2 amplifier.
The solution to the RF feedback problem requires some modifications to your GB-4000.
There are several modifications to be performed on your GB-4000. They are:
- Removal of the unshielded wires that connect the main circuit board to the OUTPUT LEVEL potentiometer, the red and black handheld electrode jacks, and the BNC connector on the rear of the instrument and replacing the old wires with new, shielded wires..
- Installing a new BNC connector in the metal rear panel of the instrument to drive the PA2 amplifier. This new BNC connector will be connected to the main circuit board with a shielded cable. An 82 Ohm, 1/4 watt resistor will be placed in series with the shielded cable to prevent overloading the PA2 amplifier when it is being driven by the GB-4000.
- Installing a new radio frequency shield underneath the GB-4000 main circuit board.
After the modifications are complete, the new BNC connector used only to drive the PA2 amplifier. The existing BNC connector will be used to drive the MOPA amplifier as it was designed to do. There will be no change in the way the GB-4000 operates when it is used according to thew manufacturer's instructions. The only operating changes will be that the PA2 will connect to the new BNC connector on the GB-4000 instead of the original BNC connector, and that the OUTPUT LEVEL control will not change the output level at the new BNC connector. When it is connected to the GB-4000, the PA2 will automatically receive the correct drive signal from the GB-4000 whenever it is connected to the new BNC connector and the GB-4000 is set to the RF MODE position.
Okay, now let's take a look at some pictures.

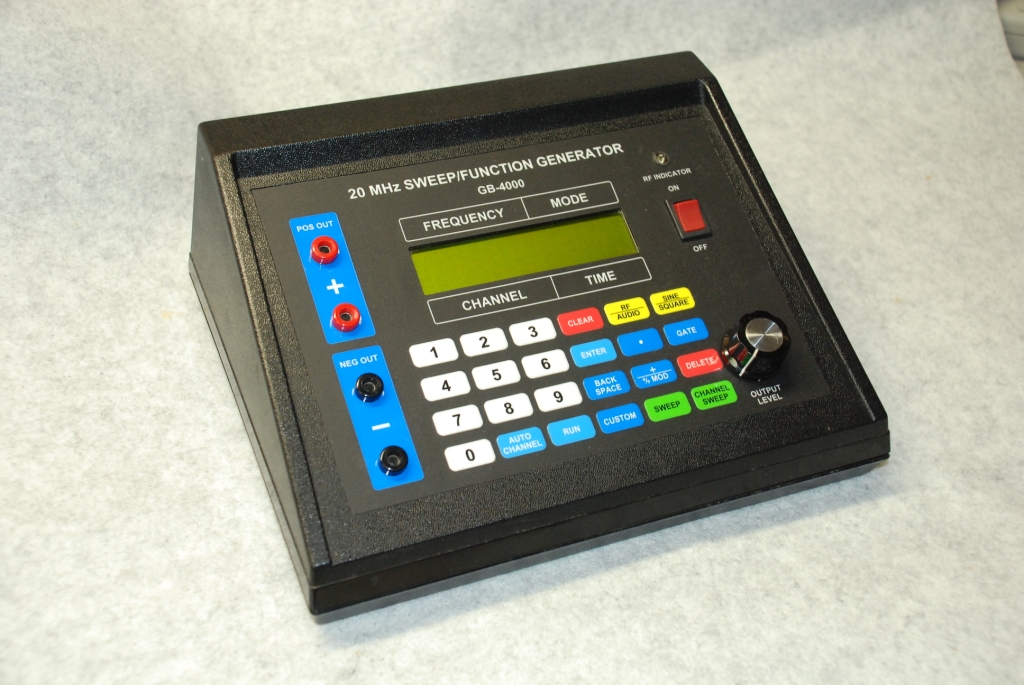
The front panel of the unmodified GB-4000.
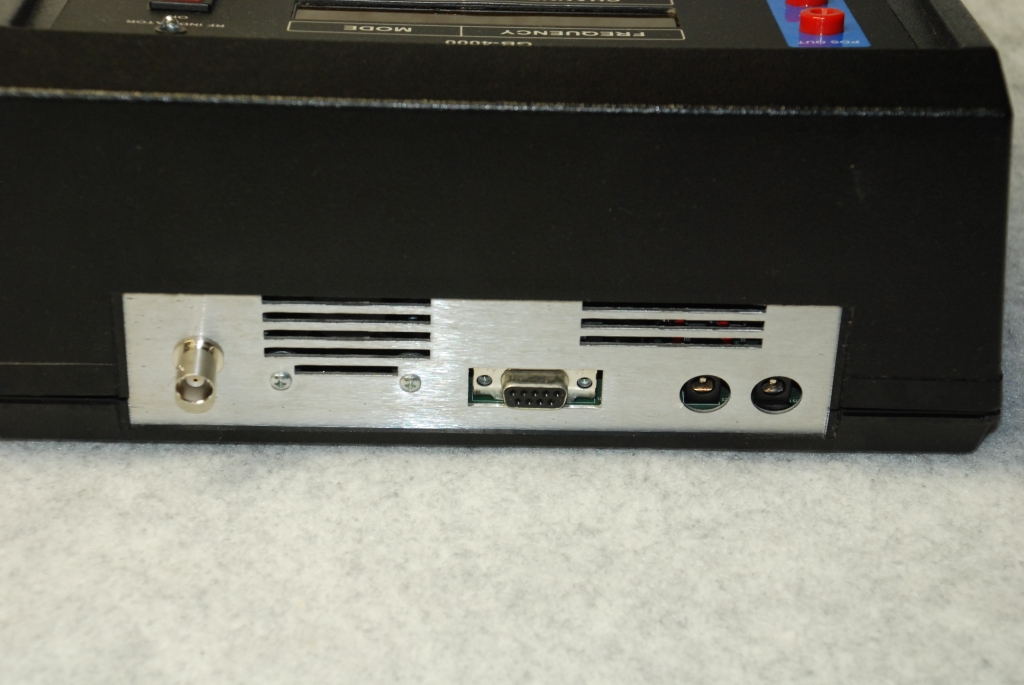
The rear of the unmodified GB-4000.
As part of the modifications, you will be adding a new BNC connector just above the existing DB-9 connector. The new BNC connector will be used for driving the PA2 amplifier. The existing BNC connector will be used in the normal manner to drive the MOPA amplifier.
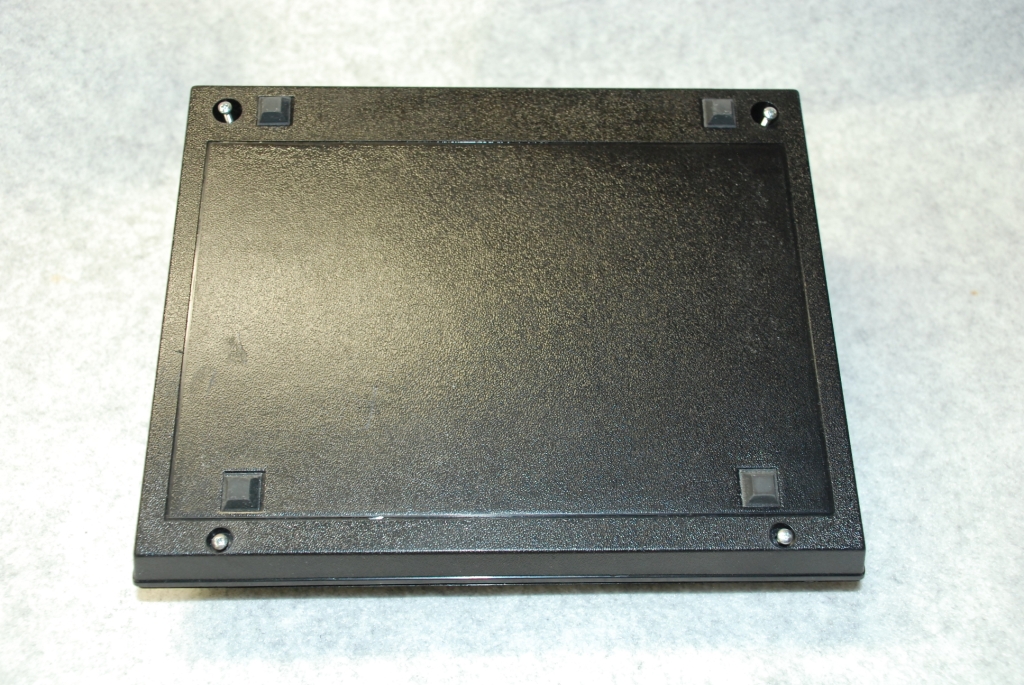
To begin, you will first need to remove the four screws in the bottom of the GB-4000's plastic case so that you can access the interior of the unit for the modifications.
I suggest using a blanket or other padded work surface so that the face of your GB-4000 does not become scratched while you are performing the modifications.
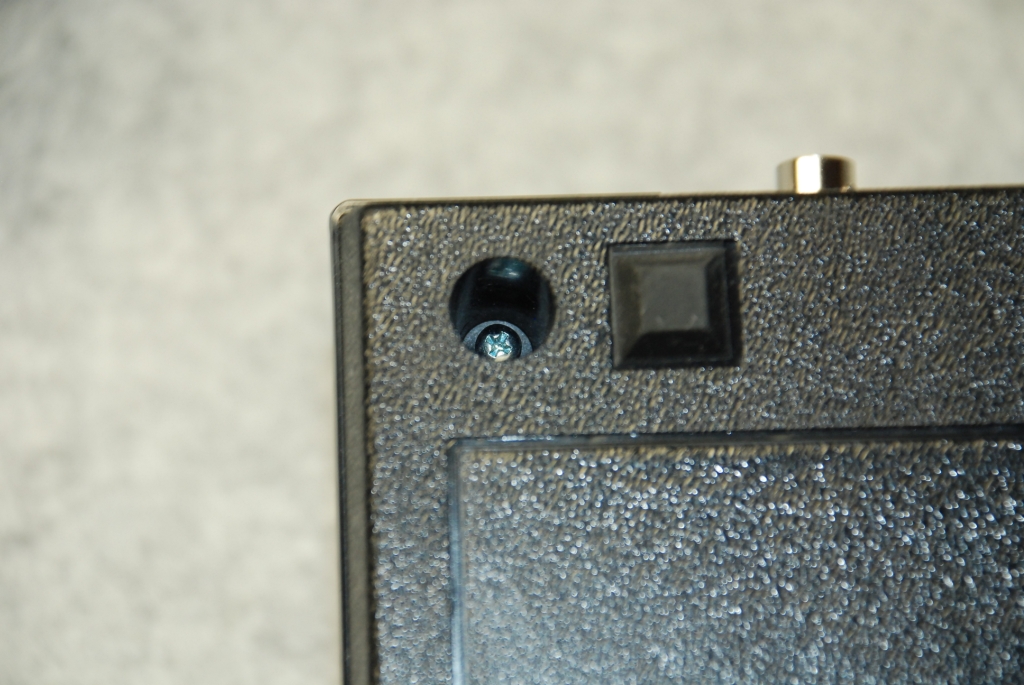
Two of the screws are recessed rather deeply into the case, while the remaining two screws are not recessed as deeply. Note that the screws are not the same length. Make note of where the long screws are places, since they must be replaced in the same locations.
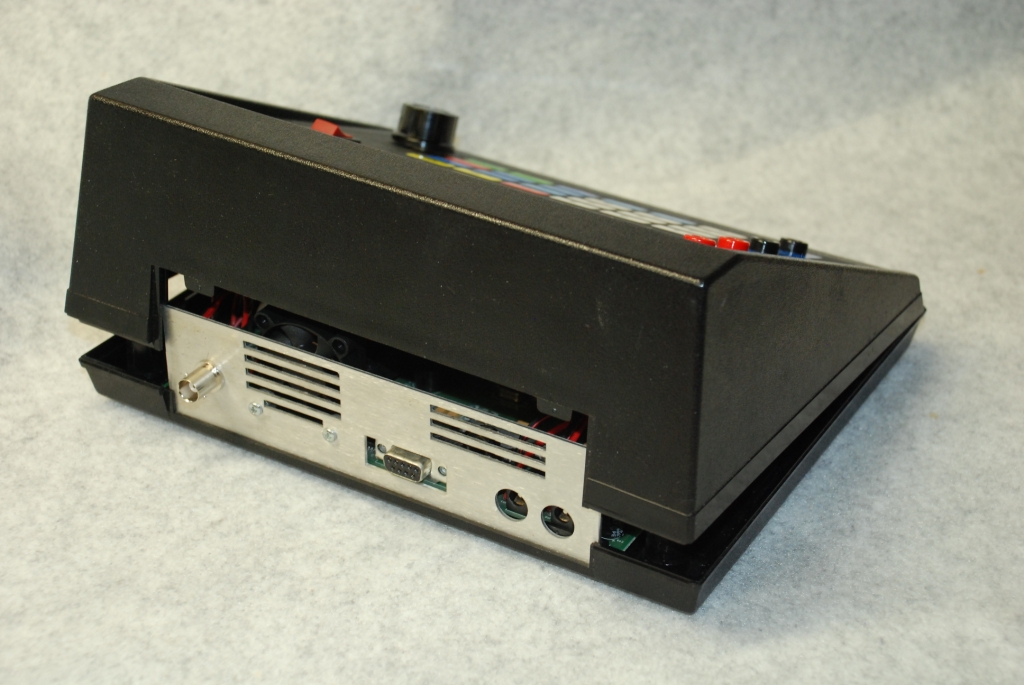
After removing the four case screws, turn the GB-4000 right side up and carefully "split" the upper and lower case sections apart. Start opening the case from the rear of the case. Open the case this way because the metal plate at the rear of the GB-4000 is a tight fit in the grooves of the case. Attempting to open the case from the front usually results in jamming and possibly cracking the rear of the plastic case.
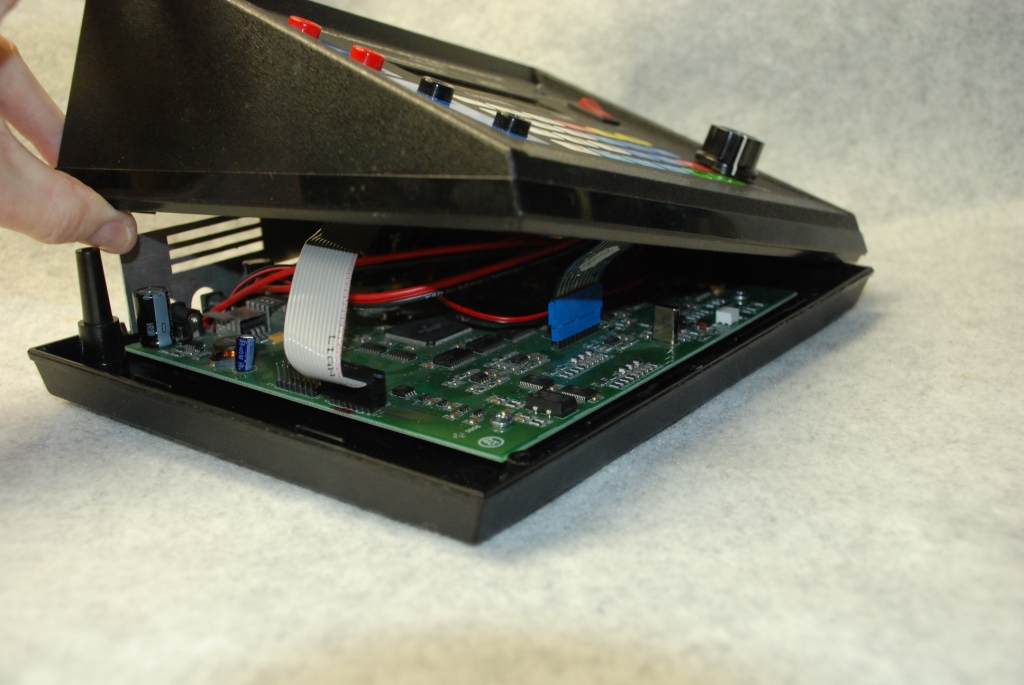
After freeing the rear panel, carefully open the case from the left side. As you open the case, you will see a gray data cable running from the front panel in the top of the plastic case to the main circuit board that is in the lower half of the case. Note that there is also a very thin, clear plastic cable with a blue connector that is visible towards the center of the main circuit board. This cable connects to the membrane key pad on the front of the GB-4000. Be VERY CAREFUL with this cable, because if it is damaged or broken, it cannot be repaired. Should the cable become damaged, you will have to return your GB-4000 to the manufacturer for repairs at your expense.
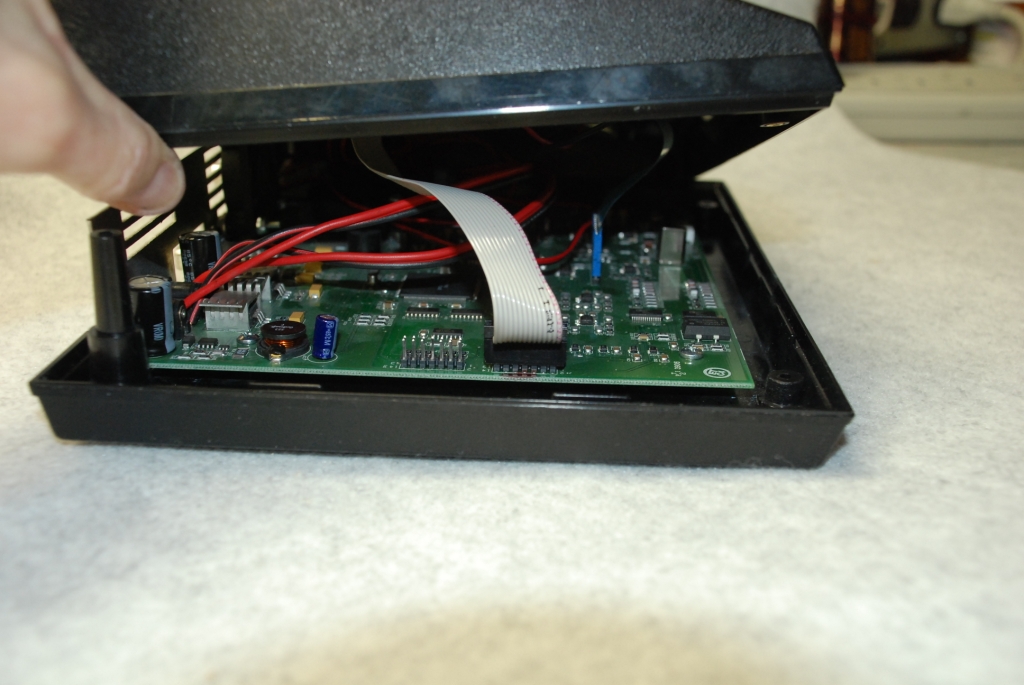
Note that there are TWO identical connectors on the left edge of the GB-4000's main circuit board. The gray data cable connects to the connector that is located closest to the FRONT of the instrument. Remember this when reassembling your GB-4000. I suggest using a marking pen to identify the correct circuit board connector before you remove the cable from the connector. As seen here, I used a red marker.
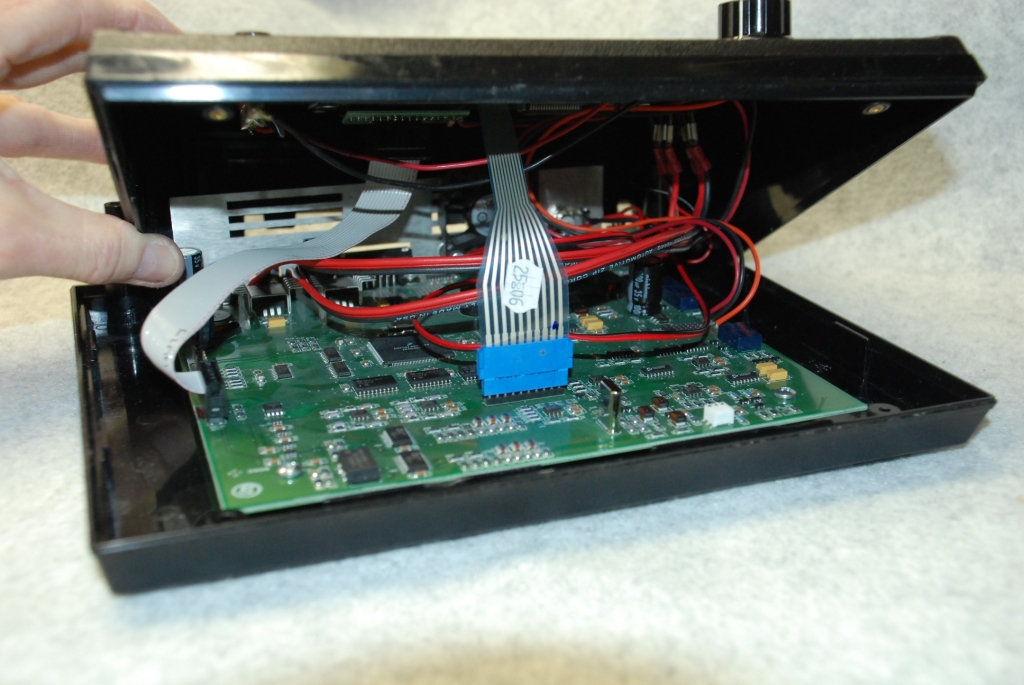
This is the thin keyboard cable that you will have to disconnect.
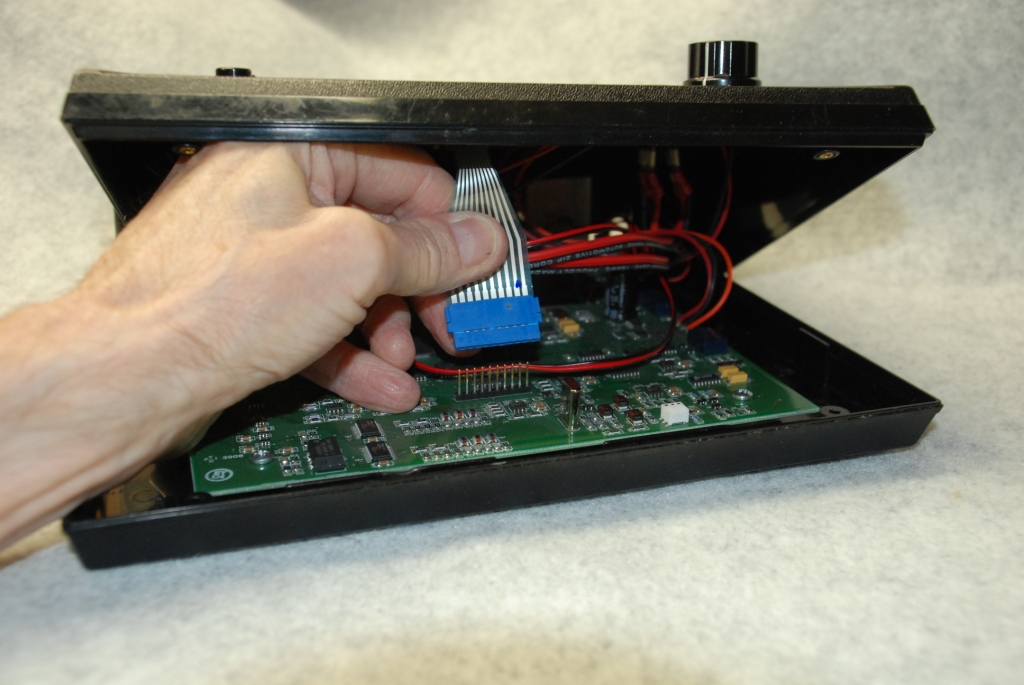
Don't grab the cable like this to remove the connector! Grasp the connector by the left and right edges of the connector and carefully pull it directly upwards from the circuit board.
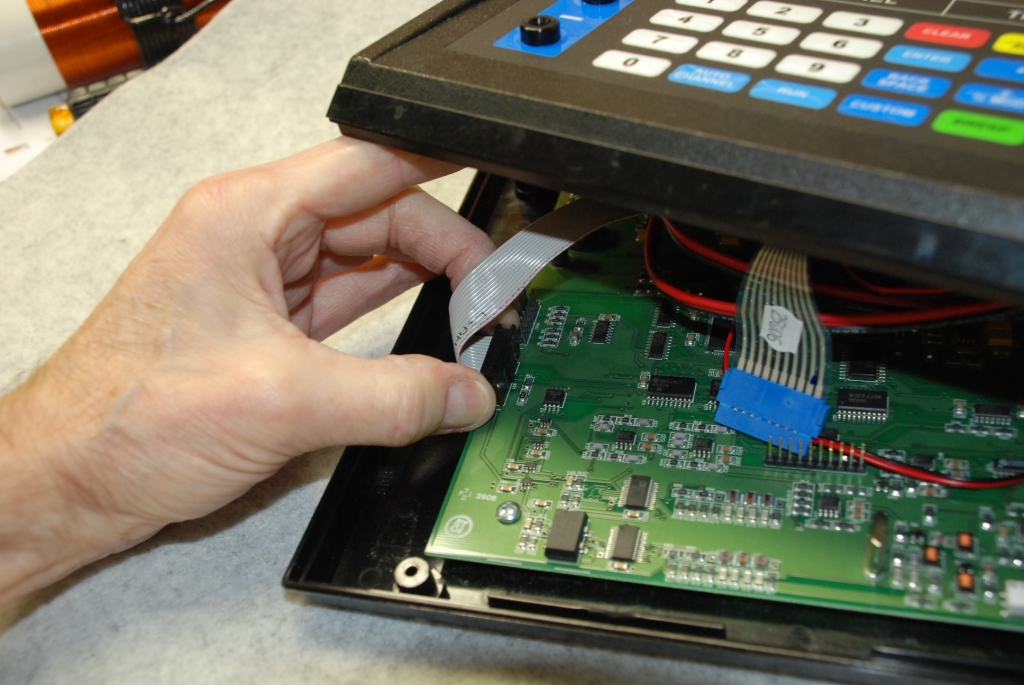
The blue connector of the keyboard cable has been carefully removed from its mating connector and the gray data cable is about to be unplugged.
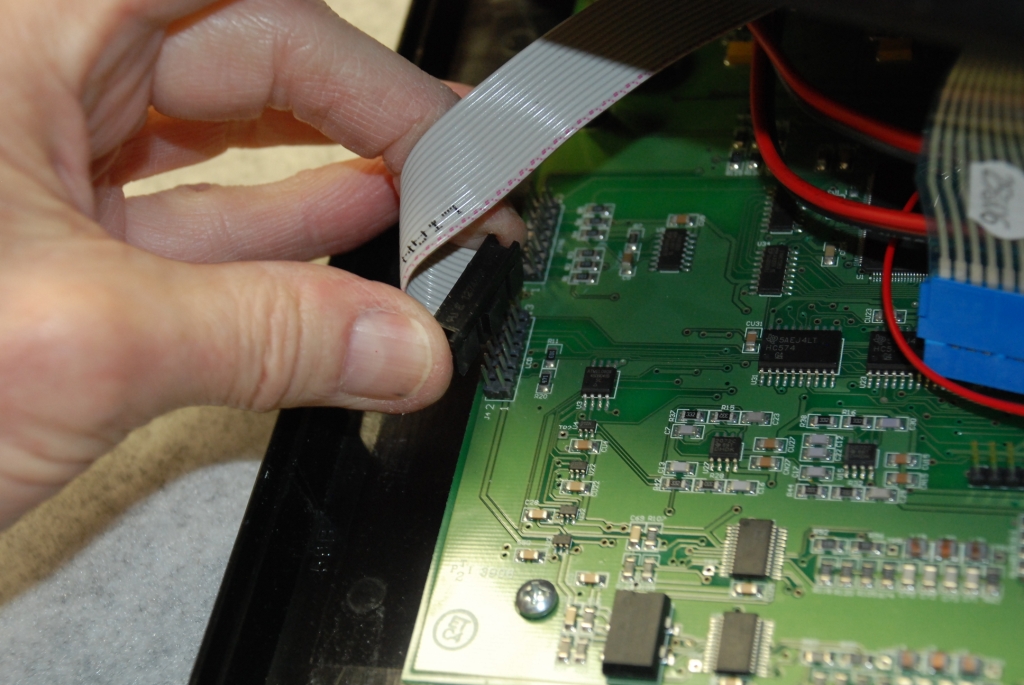
The gray data cable has been disconnected from the GB-4000's main circuit board.
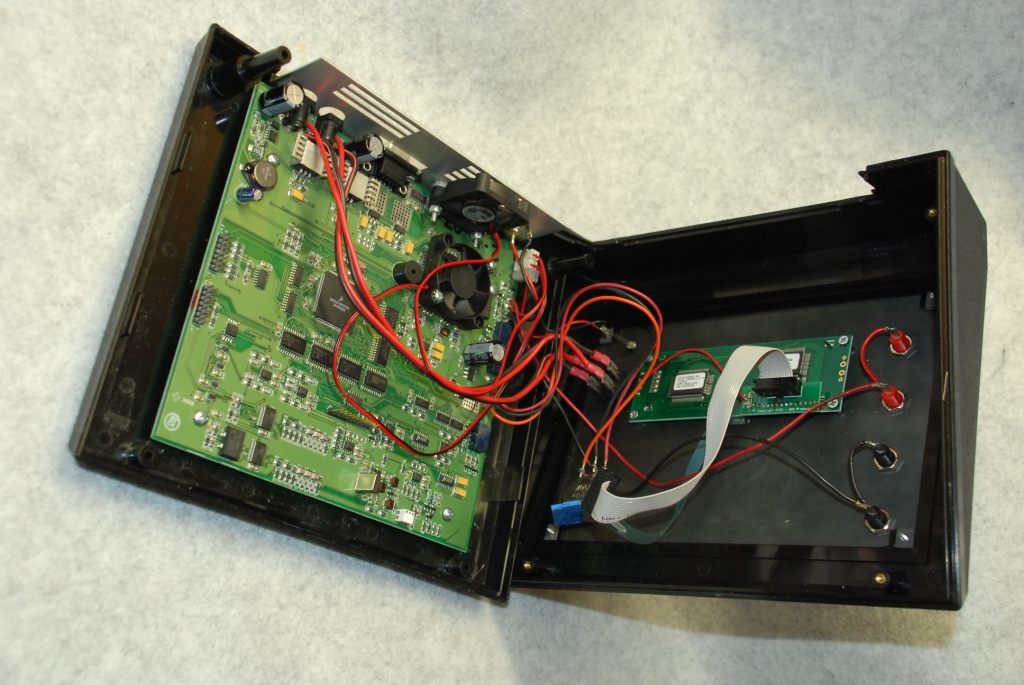
After the cables have been disconnected, carefully open your GB-4000 as shown here. Take a few minutes to familiarize yourself with where all the wires go.
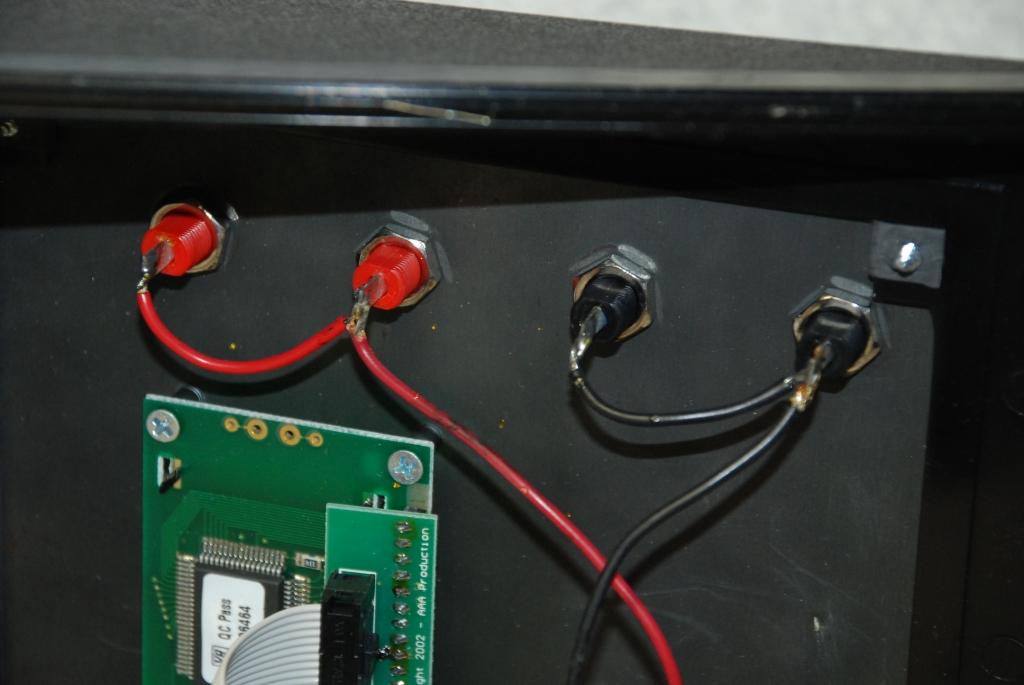
These are the red and black handheld electrode jacks. The red and the black connectors are each wired together. The jacks are then connected to the main circuit board by a pair of unshielded wires. You will replace these unshielded wires with a length of shielded wire or small diameter coaxial cable.
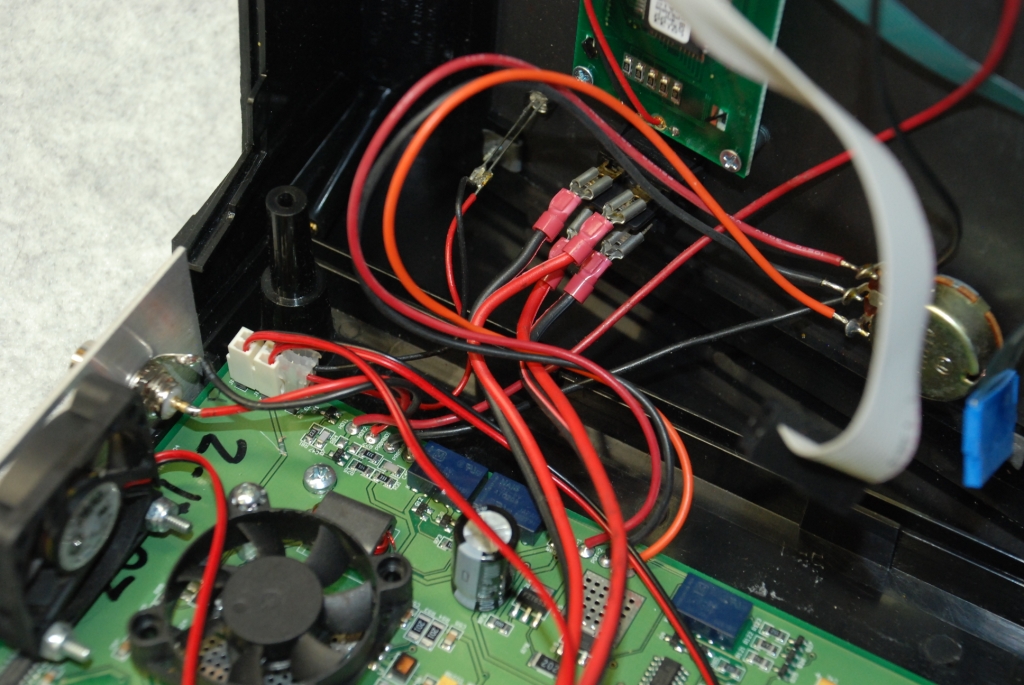
There are several items to note in this picture. First is the POWER switch with its push-on wire connectors. If you work carefully, it will not be necessary to remove these push-on connectors from the switch.
Second, note that there are three unshielded wires running from the rear of the OUTPUT LEVEL potentiometer that is behind the gray data cable to the right in this picture. You will be replacing these unshielded wires with a two-conductor shielded wire.
Third, note the unshielded wires between the rear of the BNC connector on the metal rear panel and the GB-4000's main circuit board. This will be replaced with a short length of coaxial cable.
Fourth, notice the bare wires which are a part of the front panel RF LED that is visible just to the left of the power switch in this picture. When working on the modifications to your GB-4000 and when reassembling the instrument, be careful not to accidentally short circuit the LED wires.
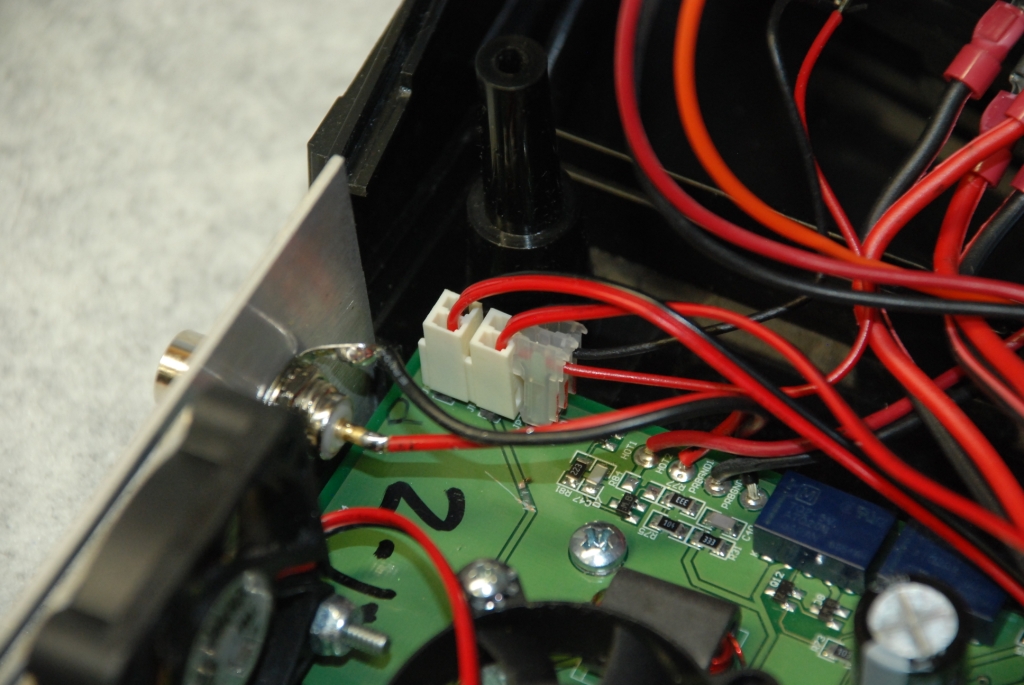
There are three 2-wire white plastic connectors at the edge of the circuit board next to the existing BNC connector. Two of the connectors are for the wires that connect to the cooling fans, and one is for the front panel RF LED. These must be replaced in the correct locations when the instrument is reassembled. You may want to place an identifying mark on the connectors and the circuit board.
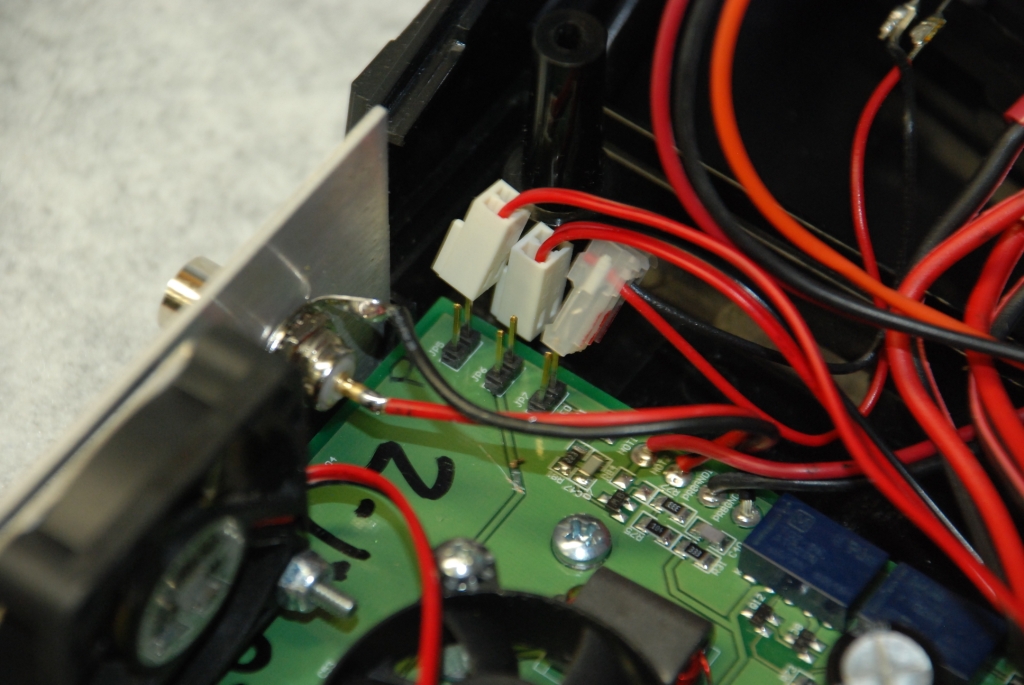
The connectors have been disconnected from the main circuit board.
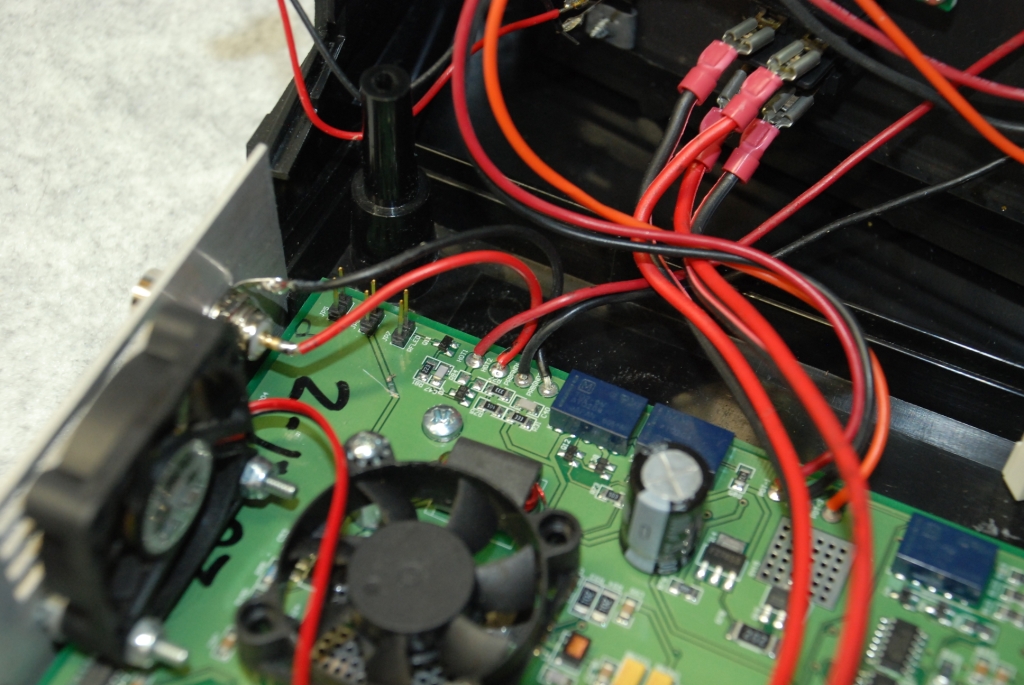
Note the unshielded wires from the existing BNC connector to the circuit board. At the circuit board, and next to the red and black wires from the BNC connector, are the red and black wires that go to the red and black handheld electrode jacks. These wires and the unshielded wires to the existing BNC connector will be replaced with shielded wires.
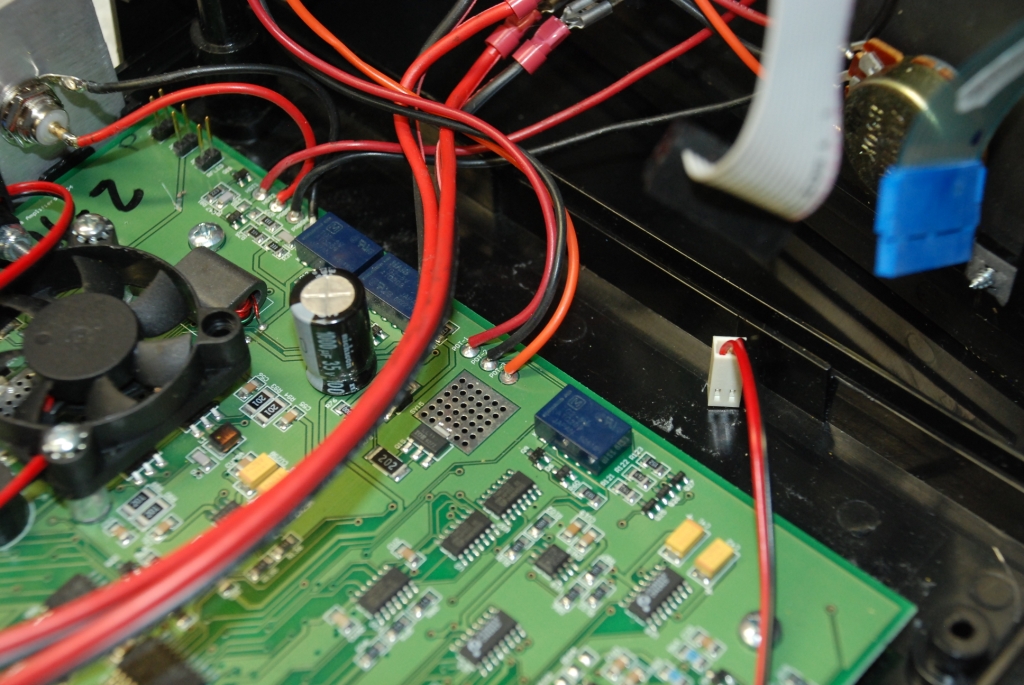
The three unshielded wires seen in the middle of this picture are the wires that go to the OUTPUT LEVEL potentiometer. The colors of the wires in your GB-4000 may not be the same as the colors seen here. You will replace these unshielded wires with shielded wires.
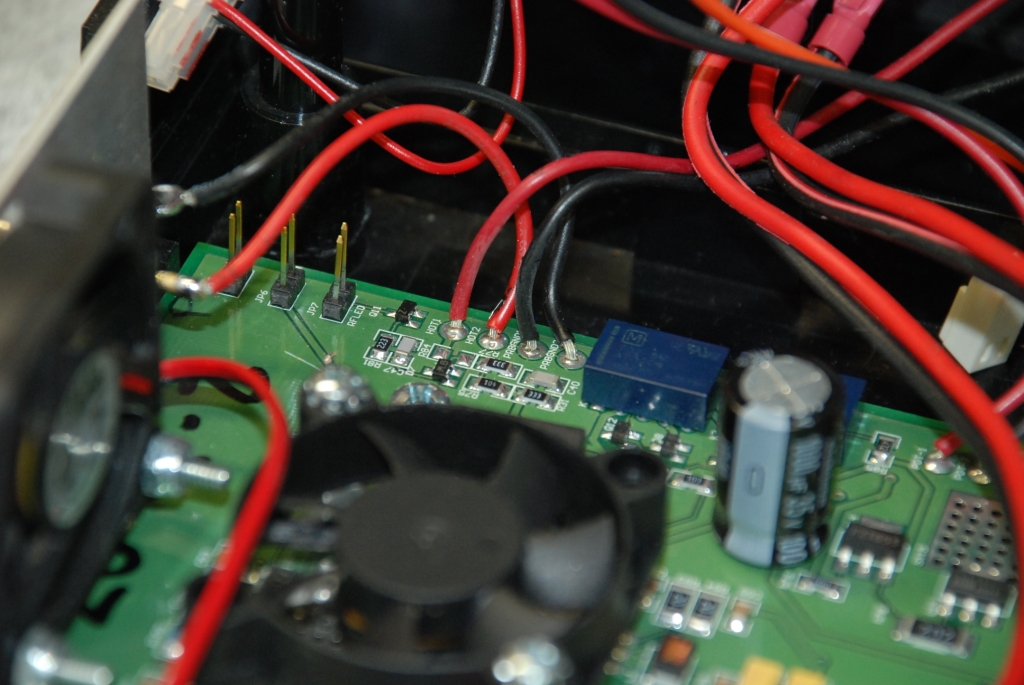
Now it's time to heat up the soldering iron and start removing the existing wires in preparation for installing the new shielded wires.
Notice in the picture that the two red wires are connected to terminals on the circuit board labelled "HOT1" and "HOT2", and the black wires are connected to terminals labelled "PRBGND1" and "PRBGND2." Electrically, both "HOT1" and "HOT2" are connected together and carry the same signal, while terminals "PRBGND1" and "PRBGND2" are connected together and are directly connected to circuit ground. All four of these wires must be unsoldered and the old solder removed from the circuit board so that the new wires may be easily placed in the solder holes.
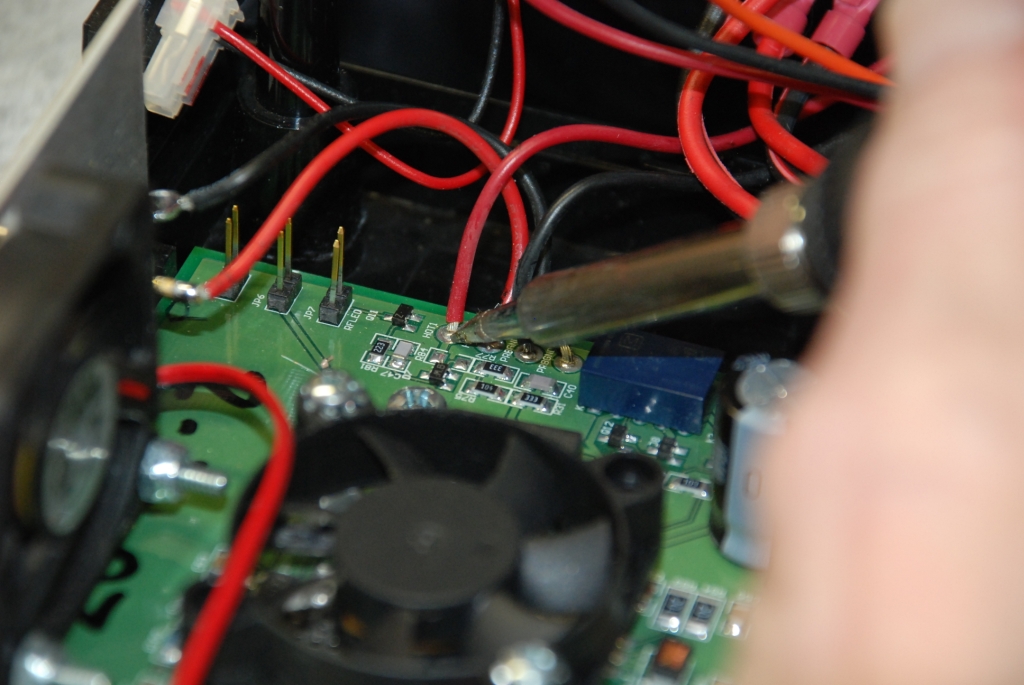
Using your soldering iron, work from the top of the circuit board and carefully but quickly unsolder each wire, one at a time. It is helpful to use a small pair of needle nose pliers to hold the wire and then remove it from the circuit board once the solder melts. Do not overheat the circuit board while removing the wires. I suggest using a soldering iron with a wattage rating of 40 to 60 watts, with a tip temperature of between 375 to 425 C. Use a large enough tip so that the tip has enough thermal mass to quickly transfer heat to the joint being unsoldered.
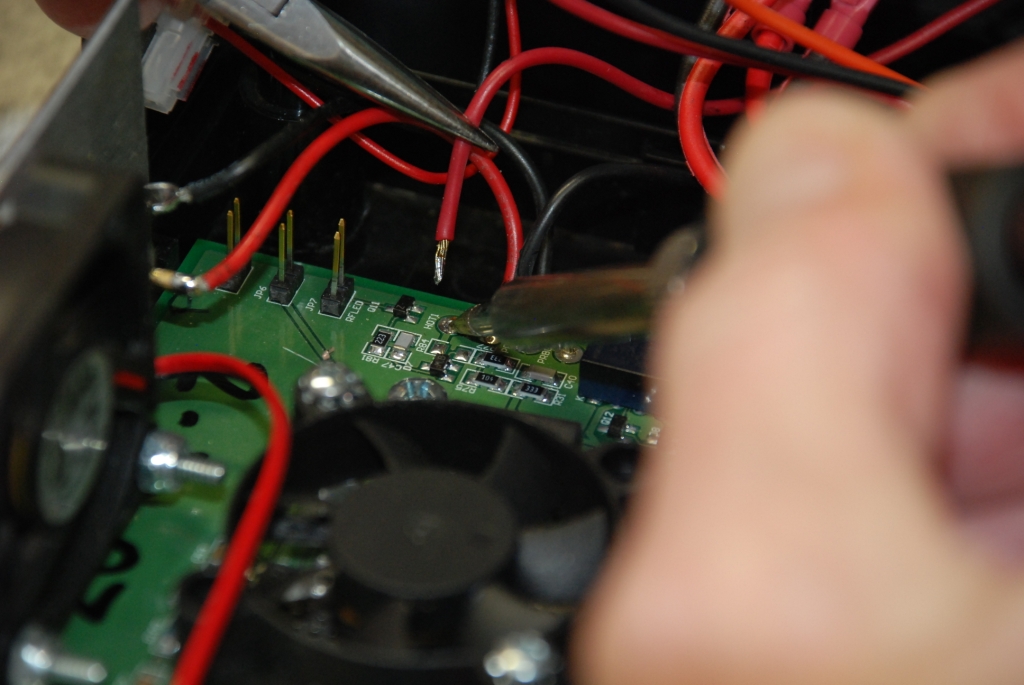
The first wire has been unsoldered. Remove the remaining three wires in the same manner.
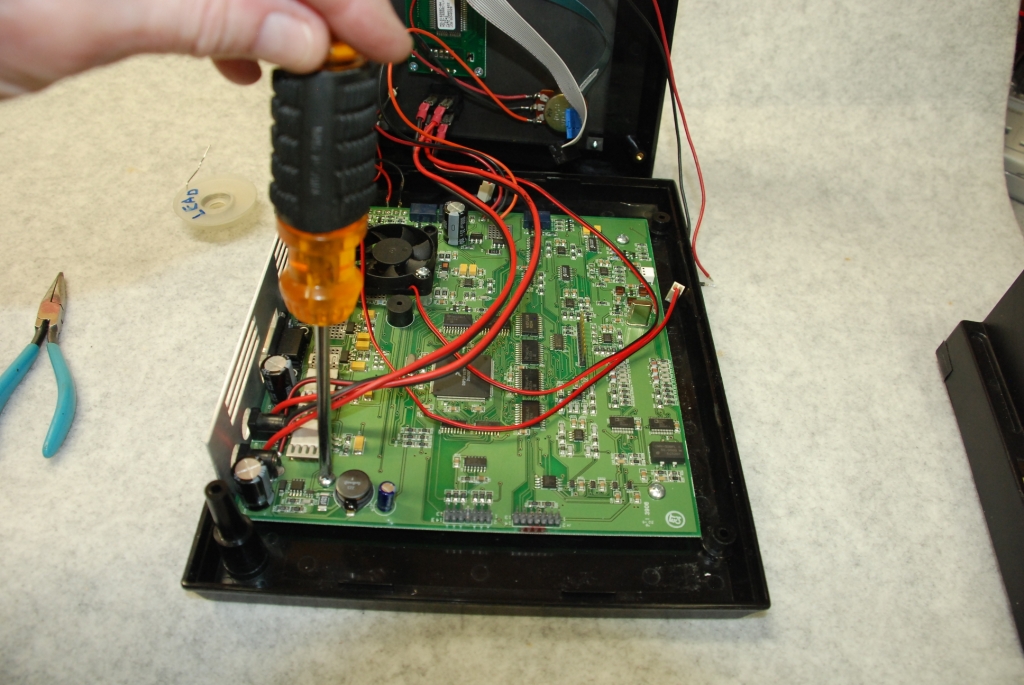
Now it's time to remove the four screws that attach the GB-4000's main circuit board to the bottom of the case. Be careful when removing the screws not to accidentally damage any of the components on the circuit board.
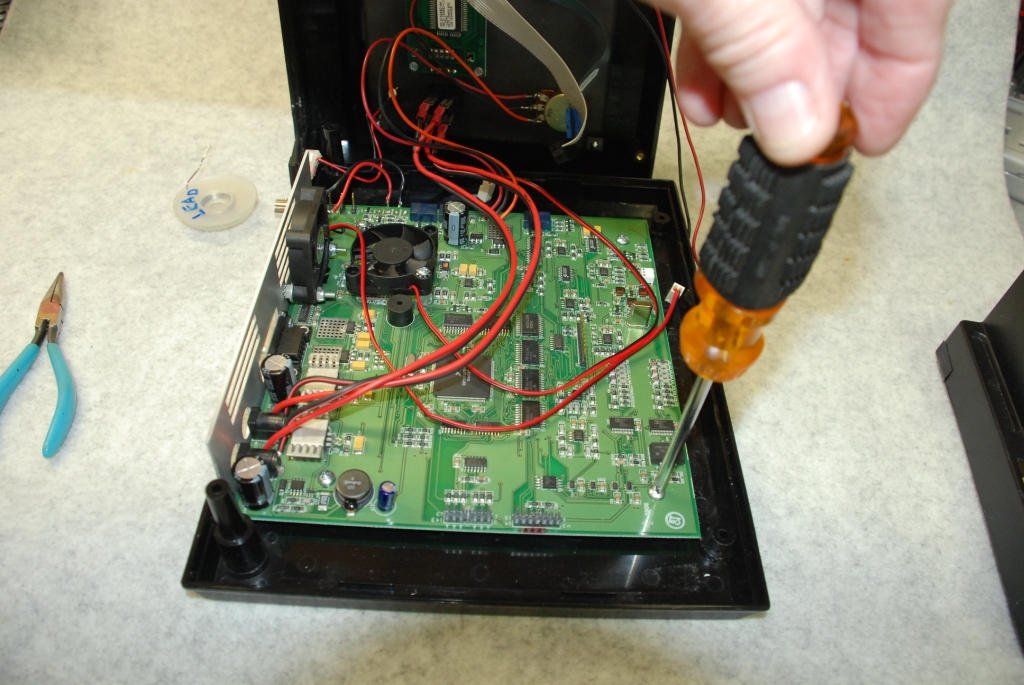
This is the location of the second screw.
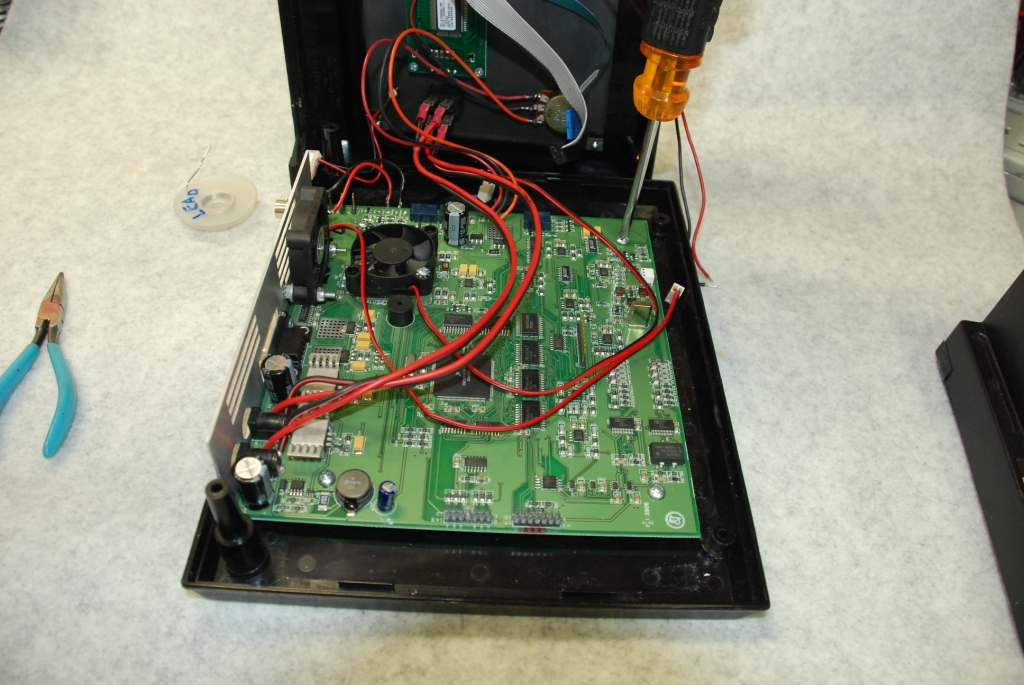
This is the third screw.
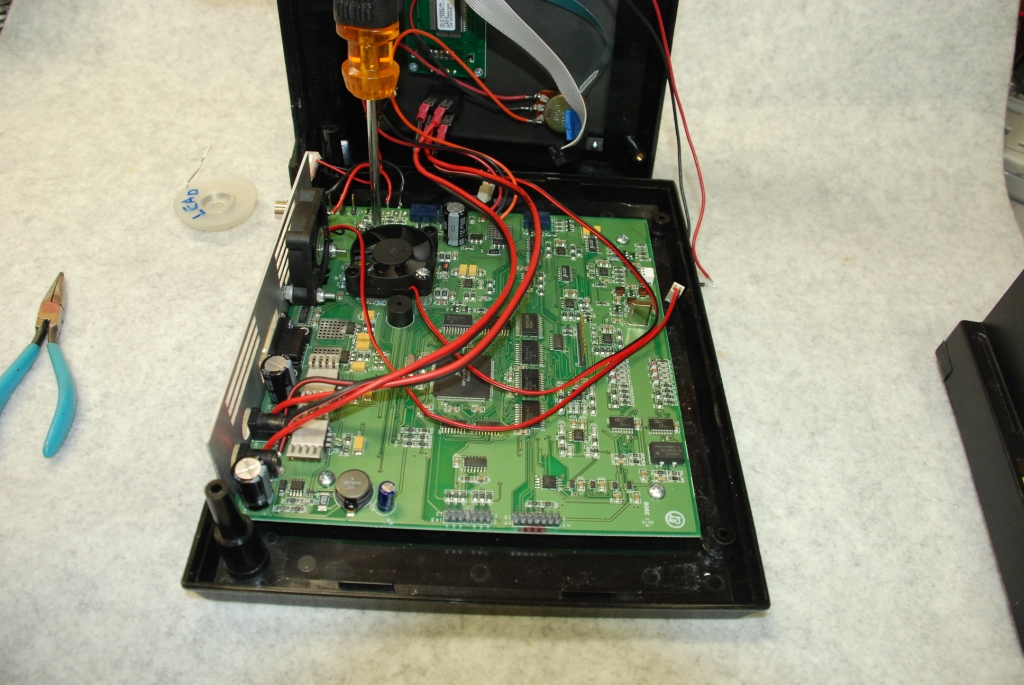
The fourth screw to be removed.
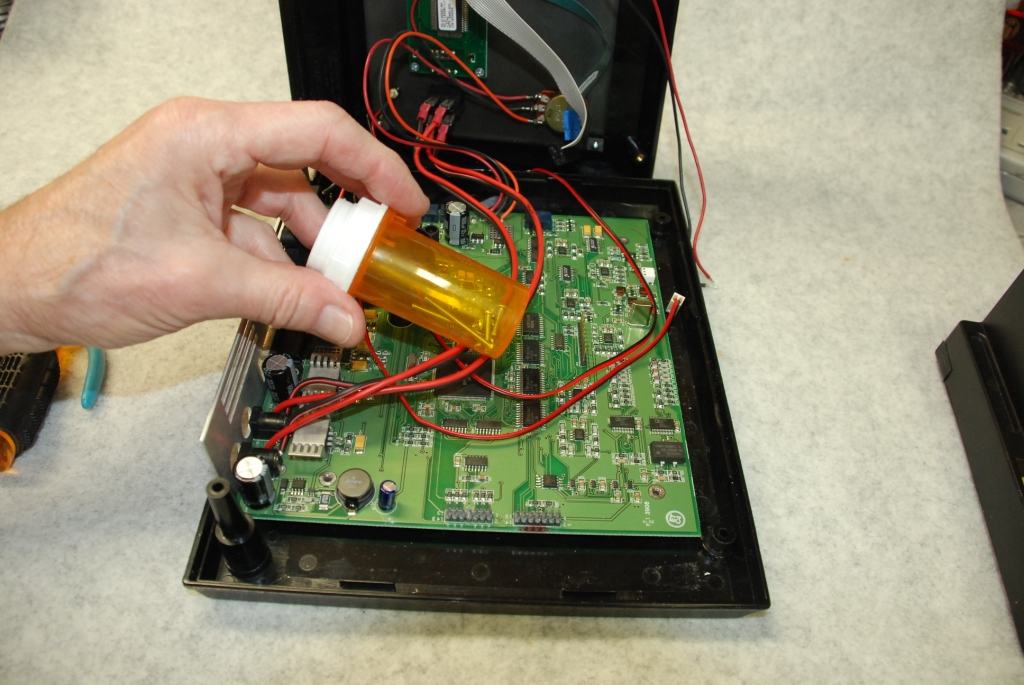
It is a good idea to put the case screws and the circuit board mounting screws in a plastic container so they don't become misplaced while you are working on the modifications to the GB-4000. Put the container with the screws in a safe place until you are ready to reassemble the GB-4000.
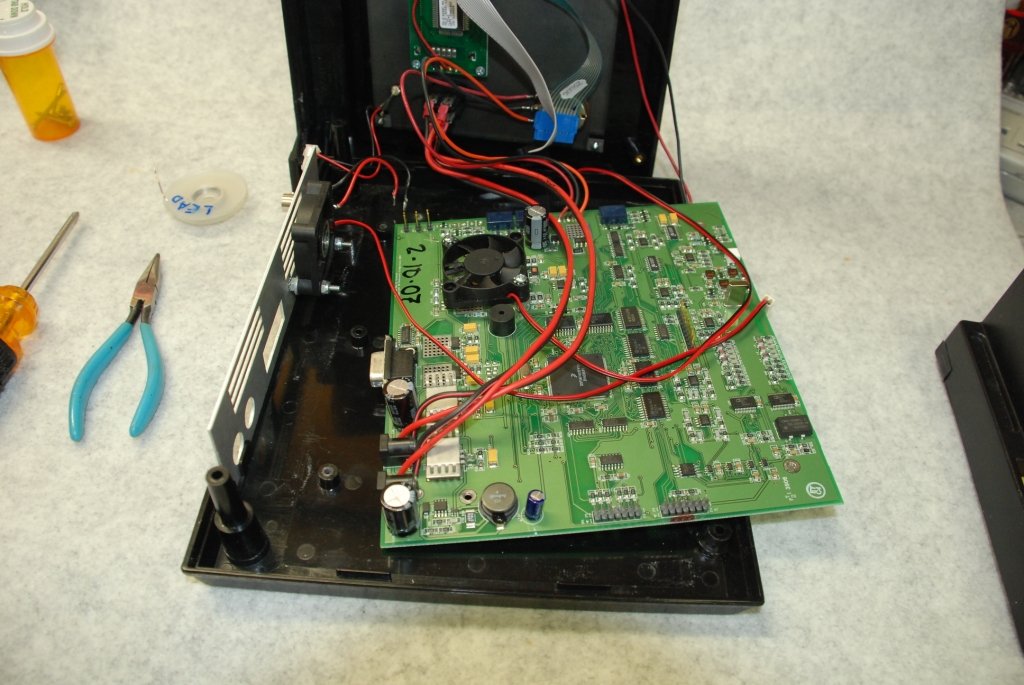
Now you can carefully remove the main circuit board from the case.
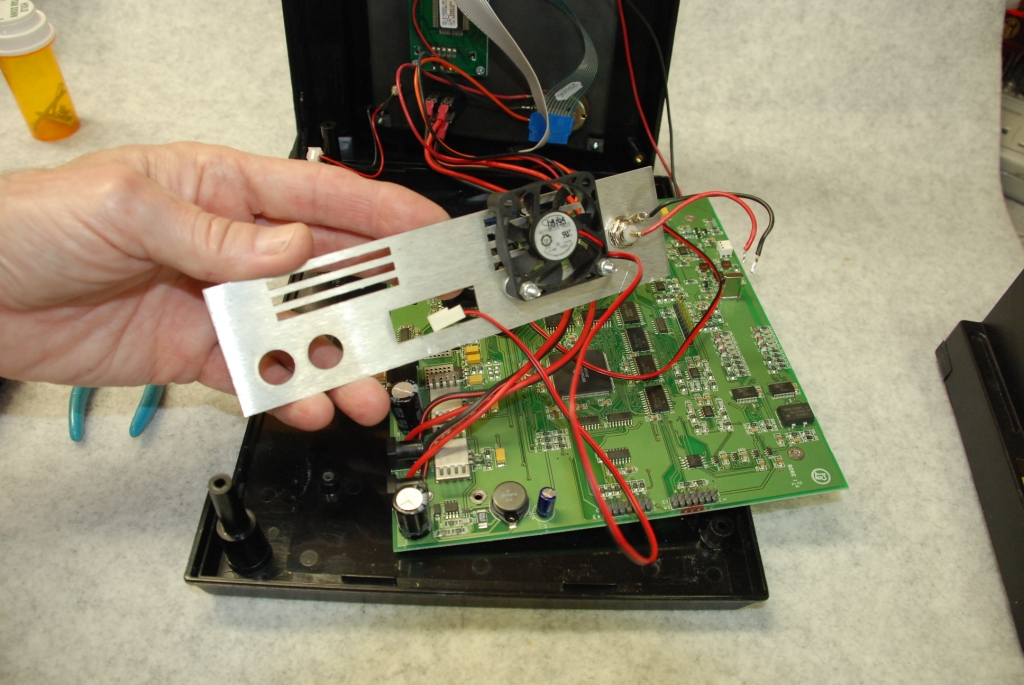
After the main circuit board is removed, the rear panel is easy to remove from the case. Set it aside for now.
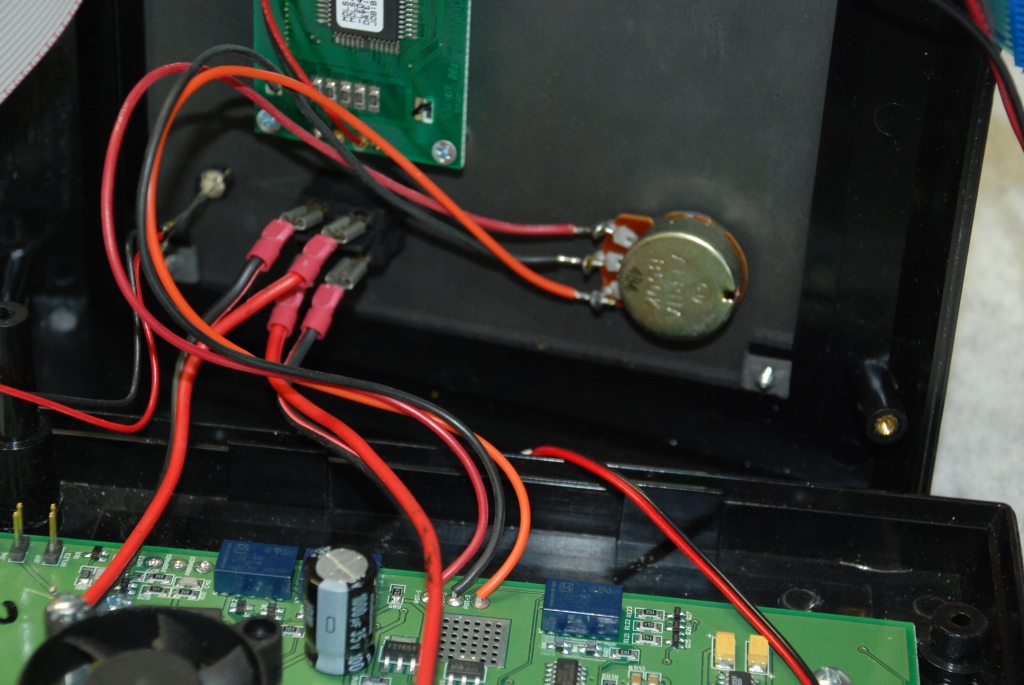
Now it's time to remove the unshielded wires between the OUTPUT LEVEL potentiometer and the main circuit board of the GB-4000.
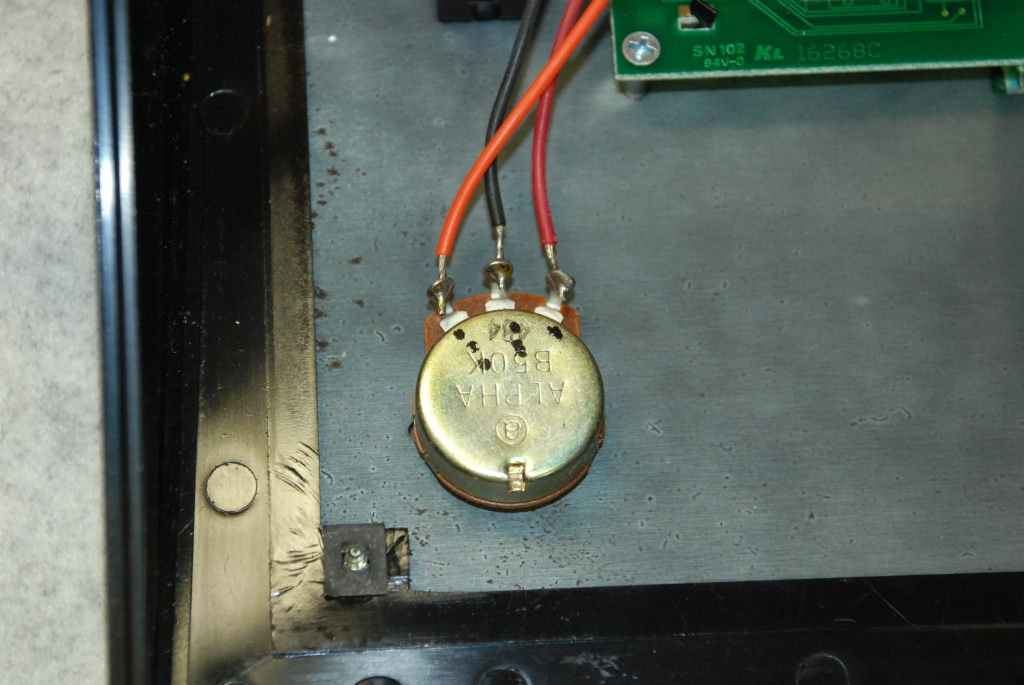
Before going any further, place three identifying marks on the back of the OUTPUT LEVEL potentiometer and on the main circuit board so that you can positively identify where the wires are connected. The shielded wires must be installed in the same configuration or the GB-4000 will malfunction.
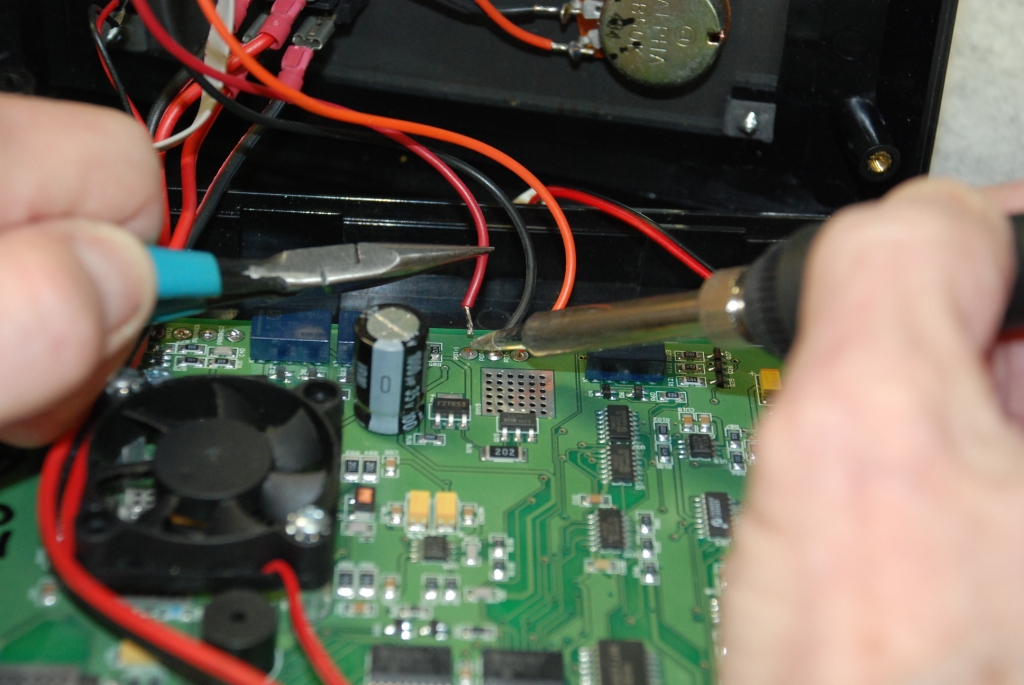
Unsolder the potentiometer wires from the main circuit board and from the potentiometer itself.
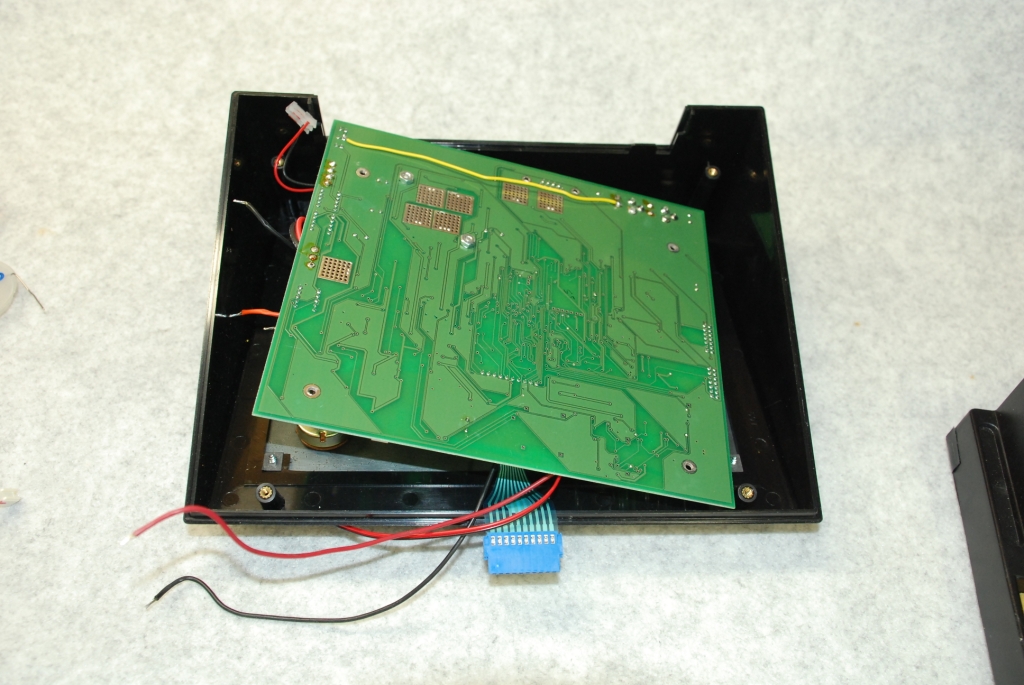
Now it's time to install the electrostatic RF shield in the bottom of the GB-4000's case. For safety, flip the top cover of the GB-4000 upside down and carefully place the main circuit board of the GB-4000 on the top cover. Place the top cover and circuit board in a safe place for now.
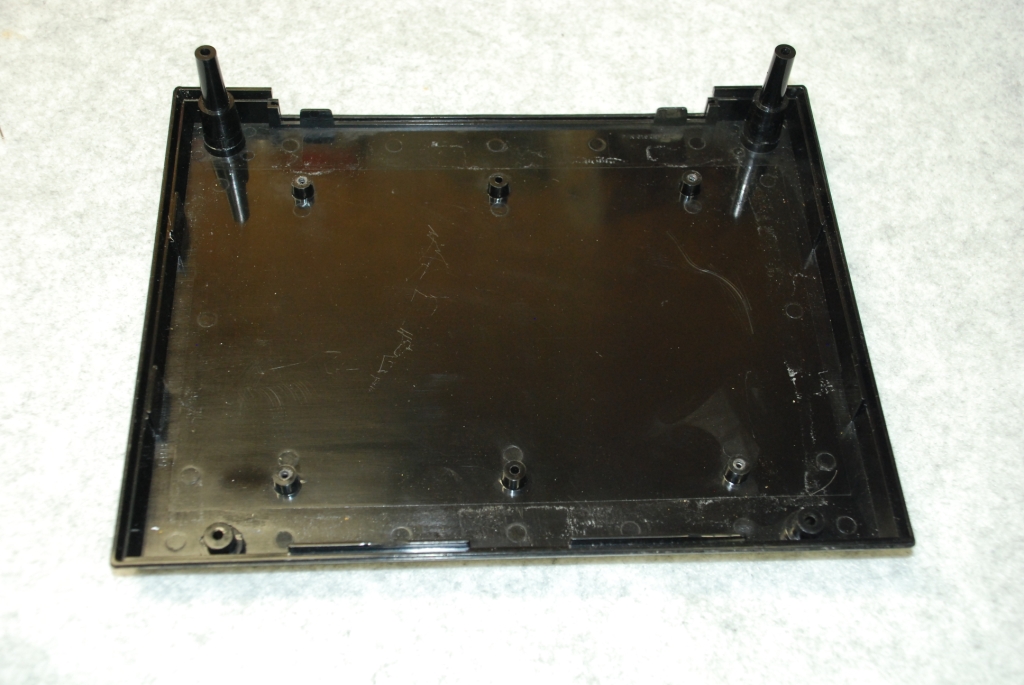
Your GB-4000's lower case assembly should now look like this. Note that there are a total of six plastic screw bosses available for mounting a circuit board, but only the outer four bosses are used for mounting the main circuit board of the GB-4000.
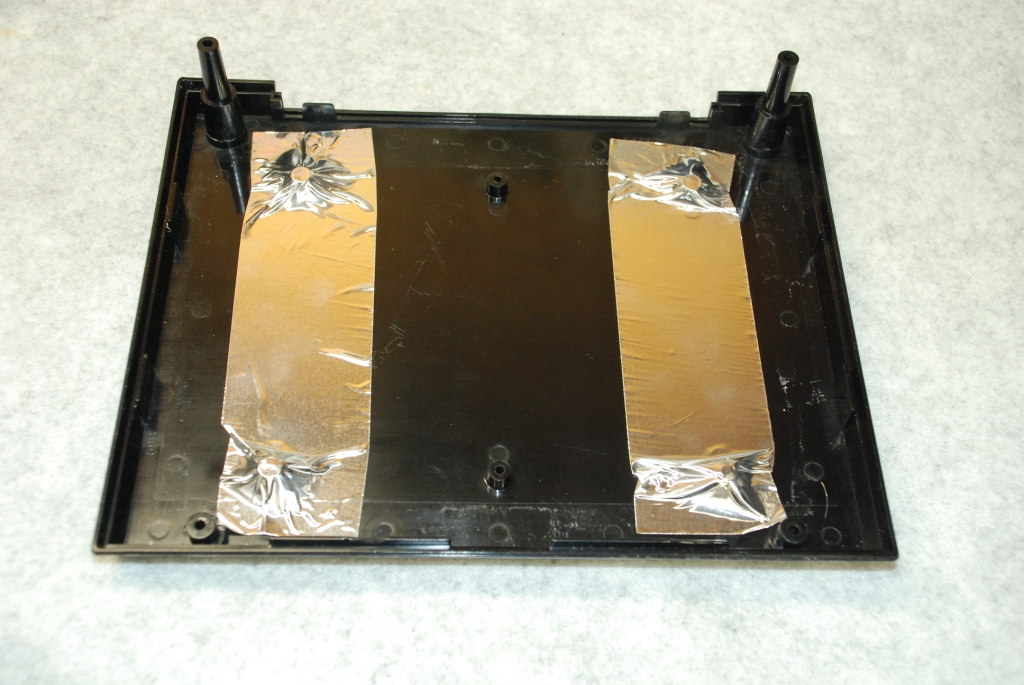
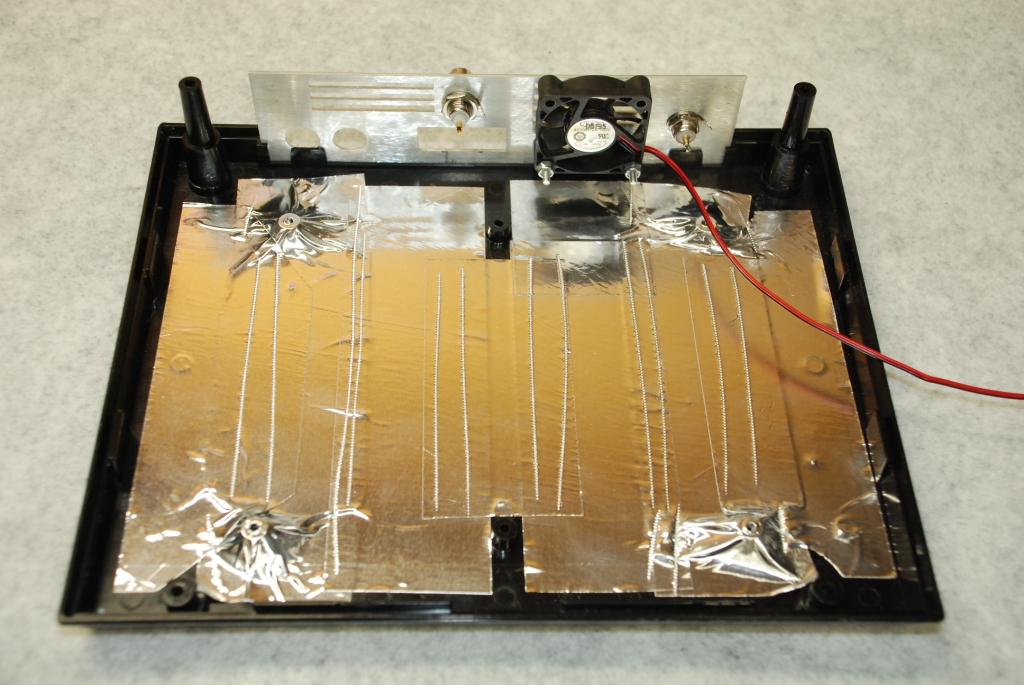
There are two ways to install the RF shield. I chose to make this shield from adhesive backed aluminum foil tape, commonly used for sealing air conditioning and heating ductwork. Although this tape is easy and convenient to use, it is essential to make sure that there is good electrical contact between the adjacent tape segments. An alternate shielding method is to use ordinary kitchen aluminum foil. You should attach the foil to the plastic case shell with some sort of adhesive to prevent the foil from moving and coming into contact with the underside of the main circuit board in the wrong place, causing an accidental short circuit.
In this picture I have installed the first two aluminum strips. The strips were placed so that they cover the outside four mounting bosses on which the main circuit board is mounted. When the circuit board is attached to the case, the four mounting screws will pass through the circuit board, the aluminum foul, and into the mounting bosses. Because the lower surface of the GB-4000's main circuit board where the mounting screws pass through the board are connected to circuit ground, the aluminum foil will be connected to the GB-4000's circuit ground when the board is screwed down to the bottom of the case. This will shield the GB-4000 from RF interference pickup through the bottom of the instrument.
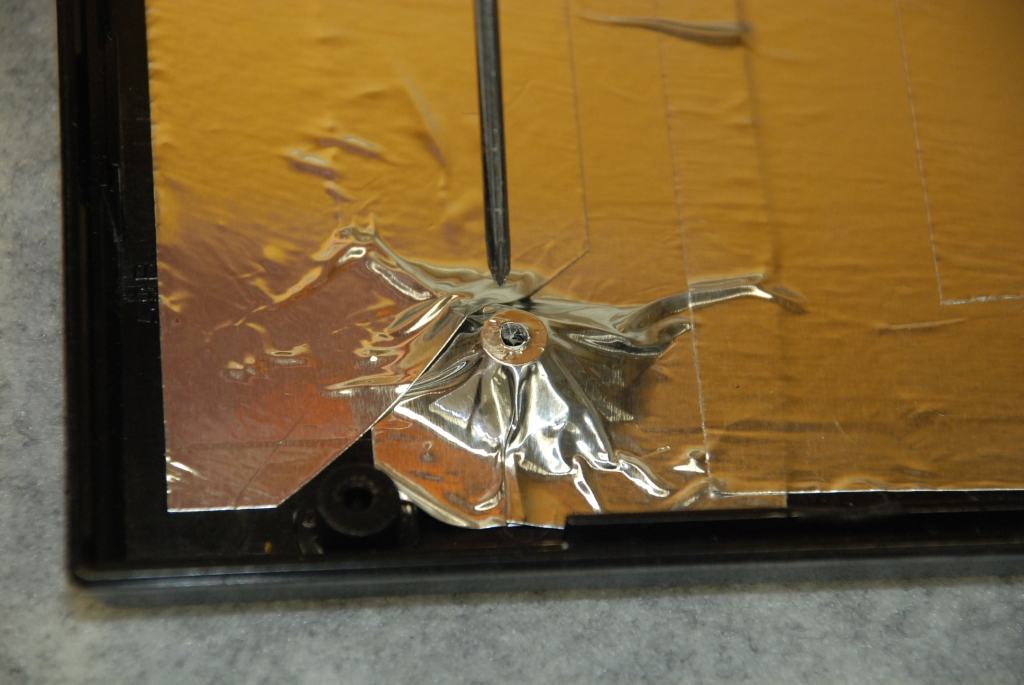
After the aluminum shield is installed, you will need to take a pointed tool such as a screwdriver or sharpened pencil and perforate the aluminum shield at the four mounting bosses so that the circuit board mounting screws can pass through the foil when the circuit board is reinstalled in the case. Do this for all four outside mounting bosses. Remember that the two center mounting points are not used, and they do not need to be covered with the aluminum shield.
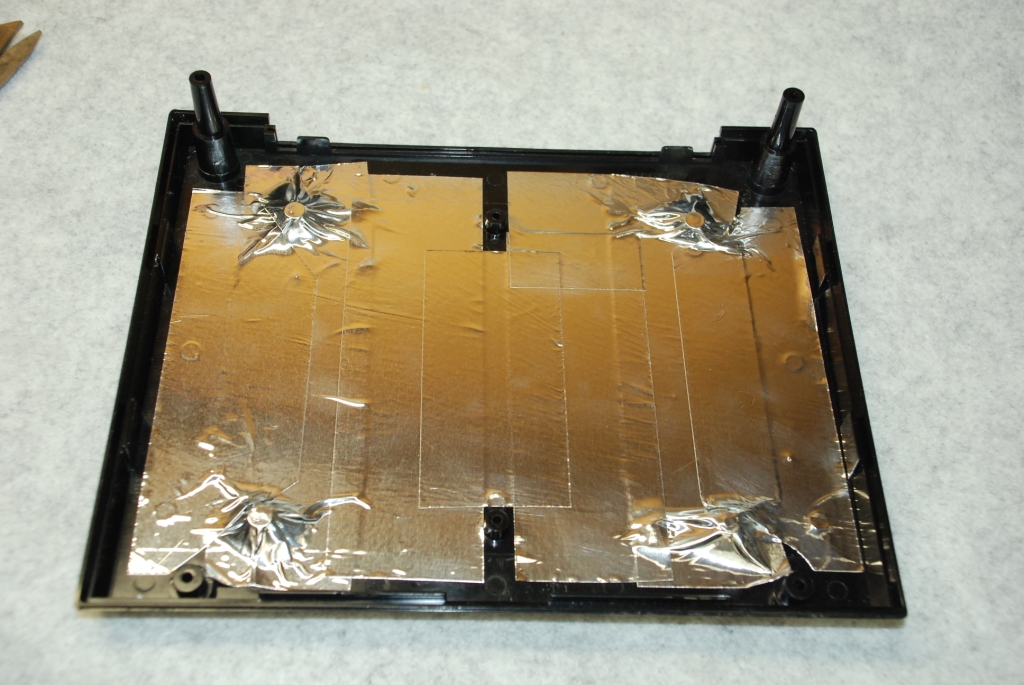
Here is what the adhesive backed aluminum foil shield looks like after all the strips have been put in place. Note that the holes in the mounting bosses have not been made at this point.
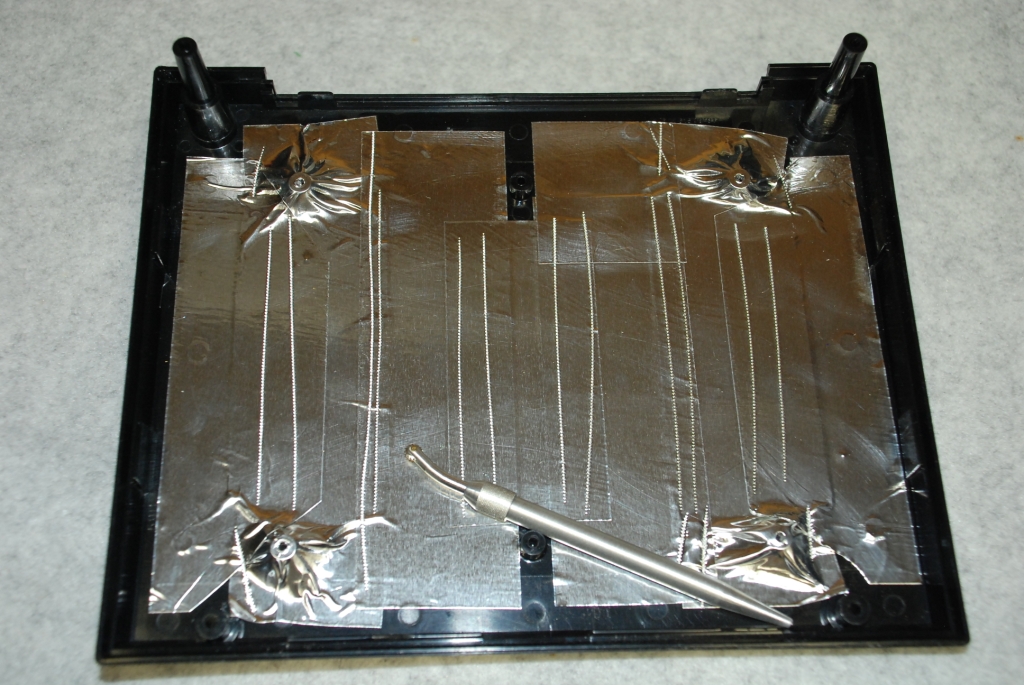
Since it is essential to have good electrical contact between the different sections of the aluminum tape, I used a handy little tool that used to be quite common in the burglar alarm trade when windows were protected by using lead foil around the perimeter of the window. It is called a "foiling tool." I used the tool to make a series of perforations through both layers of tape. These punched holes make a good electrical connection between tape layers.
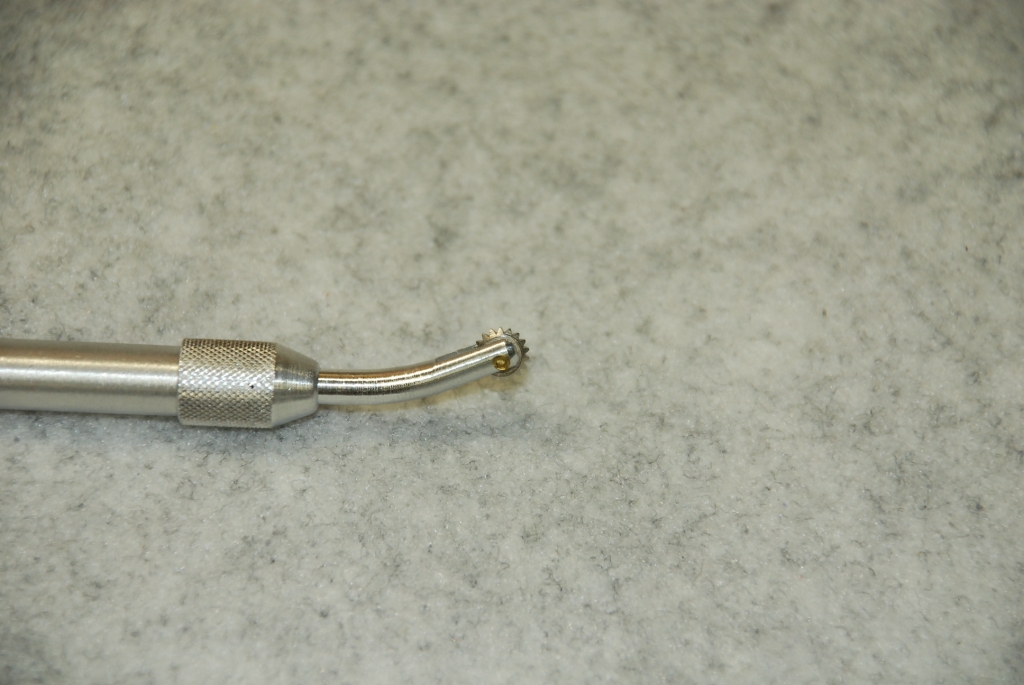
This is the "business end" of the foiling tool. It looks somewhat like a cowboy's spur. As the wheel is rolled along the tape, the points punch holes through the tape, connecting the layers together.
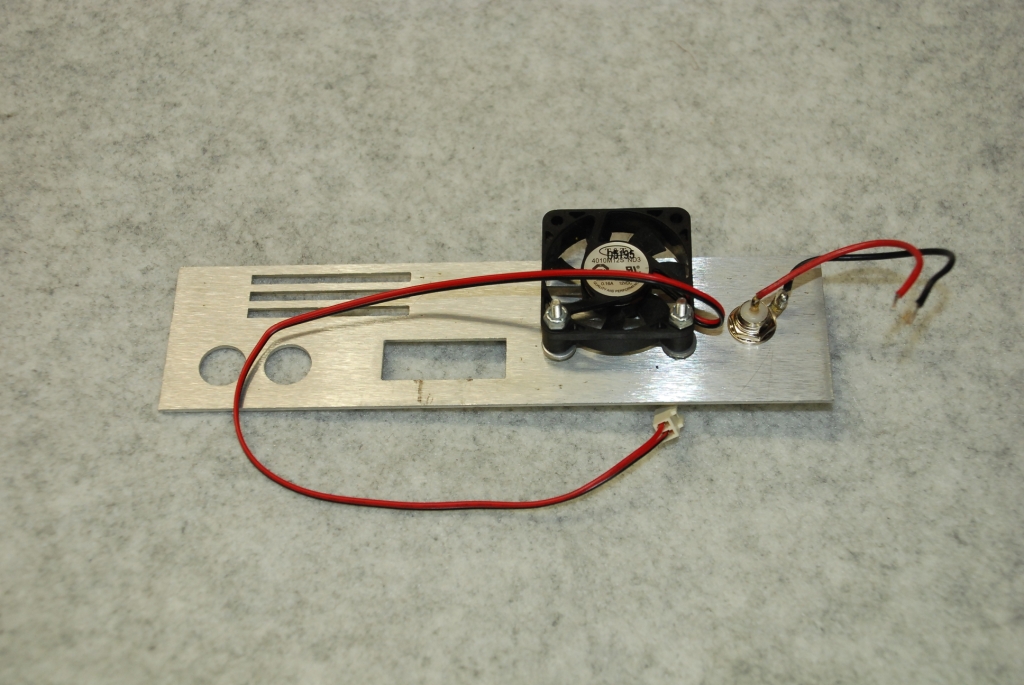
Now, take the back plate and unsolder the red and black wires from the BNC connector. Remove the old solder from the connector so the new wires will go in place easily.
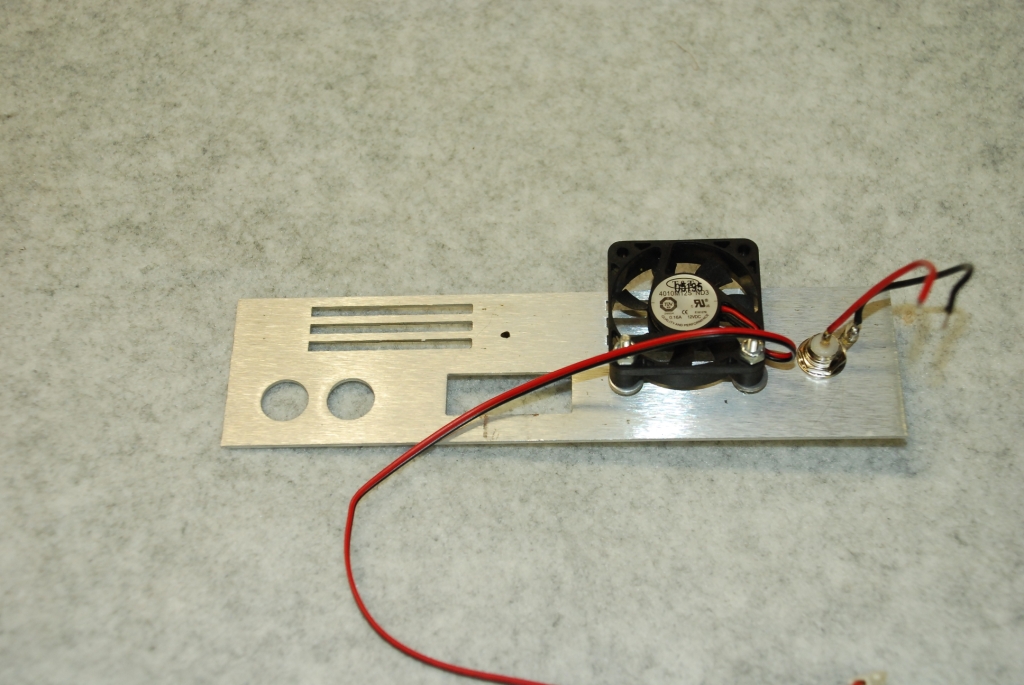
See the little black mark near the center of the back plate? That is where you will drill a hole to mount the new BNC connector.
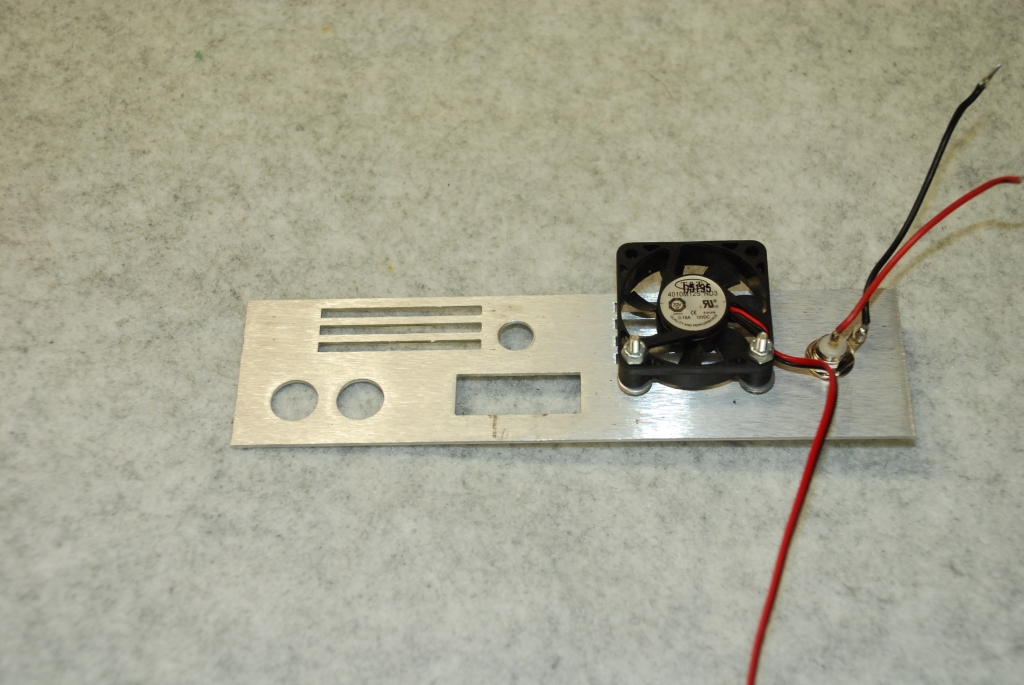
The hole has been drilled through the back plate. The hole should be 3/8" / 0.375" / 9.525 mm diameter for a standard BNC connector.
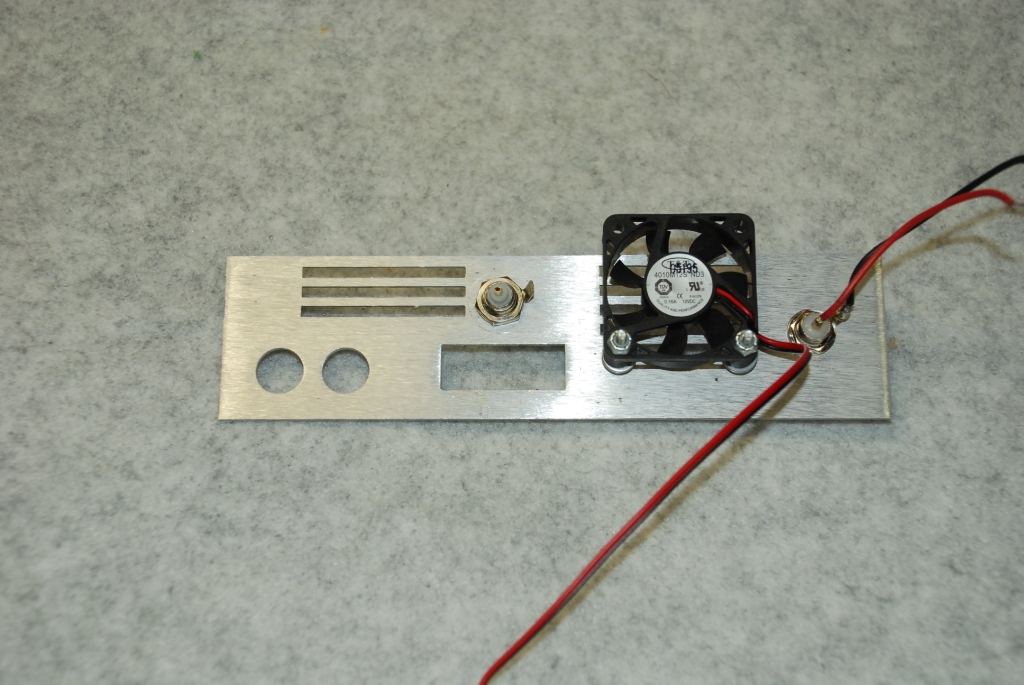
Mount the new BNC connector on the back plate. Be sure to tighten it firmly so that it makes a good mechanical and electrical connection to the metal plate. Position the ground wire solder point as shown. This positioning will make installation of the new wires easier.
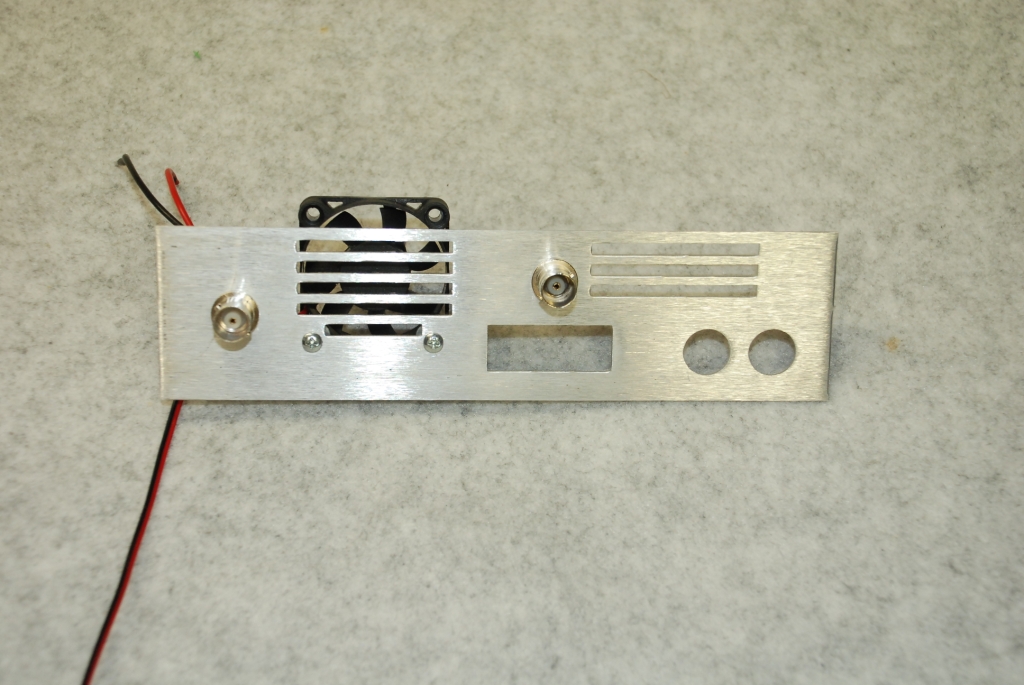
The position of the new BNC connector as seen from the outside (rear) of the rear panel. Notice that it is slightly to the right of center above the rectangular cutout for the DB-9 connector.
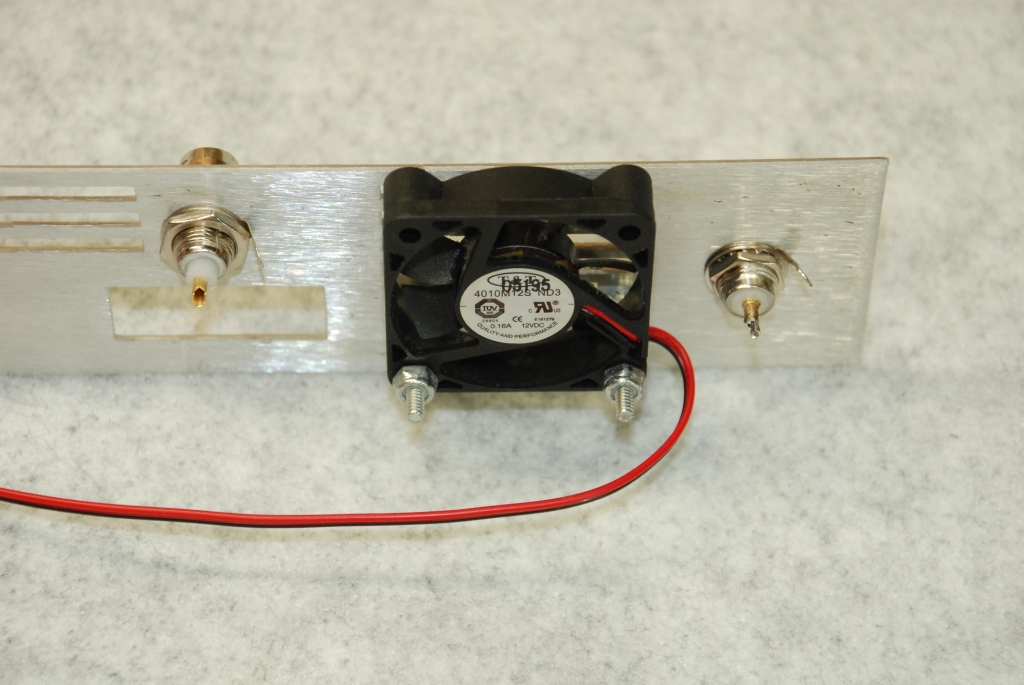
Now you are ready to start installing the new shielded wires.
Replace the back plate in the lower case section.
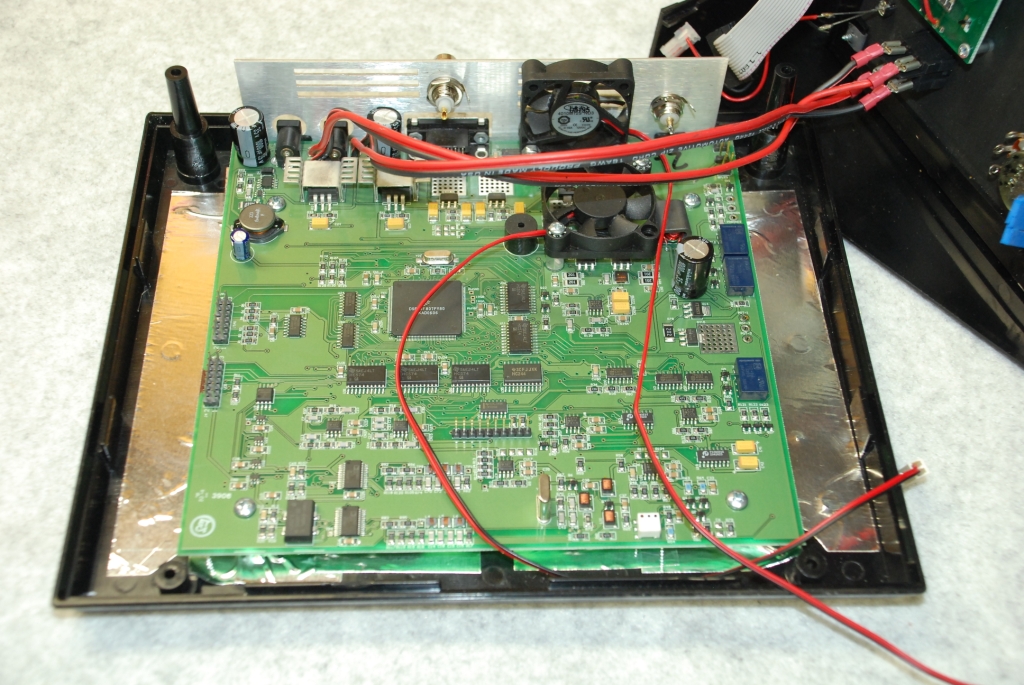
Carefully reinstall the GB-4000's main circuit board in the lower half of the case. Be sure the four mounting screws are carefully but firmly secured so that the aluminum RF shield is tightly pressed against the bottom of the circuit board where the boars contacts the bosses. The shield should not touch the circuit board anywhere else except directly under the mounting bosses.
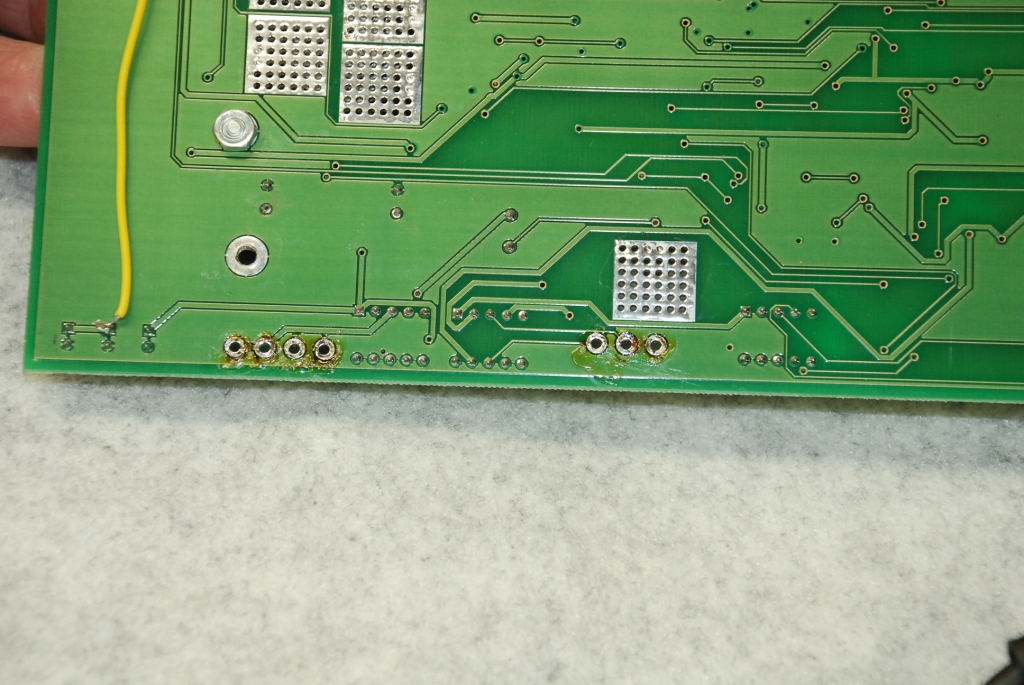
Make sure the wire connection holes for the potentiometer, the hand held electrodes and the original BNC jack are clear and free from solder so that the new wires will go in place easily.
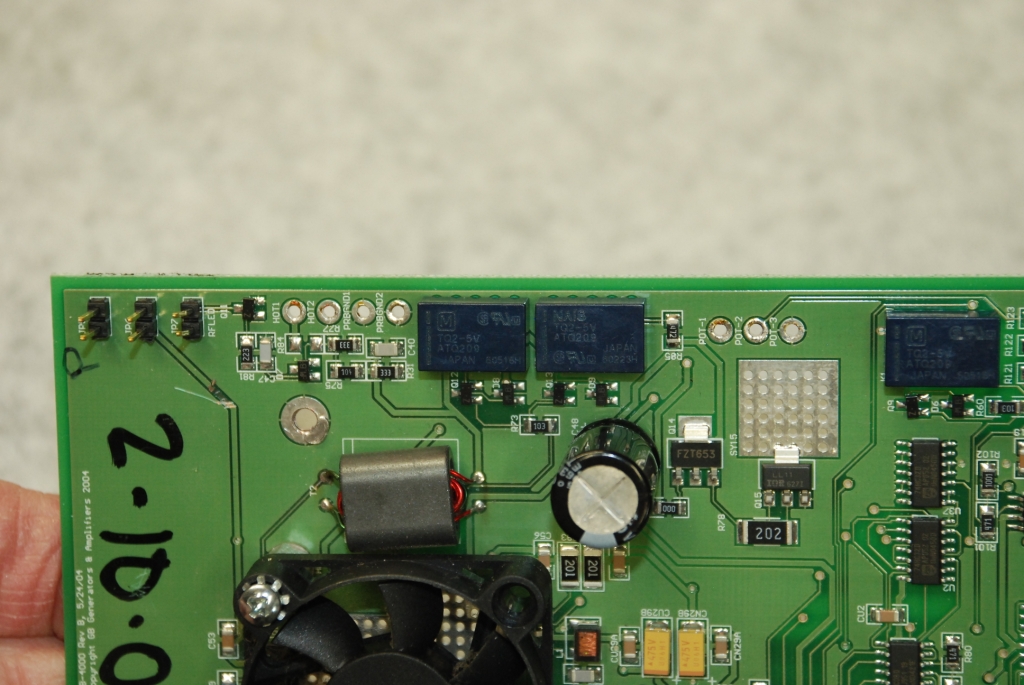
This is a top view of the connection points for the new wires after the holes have been cleared of the old solder. Clear the holes of solder before you reinstall the circuit board in the lower case section.
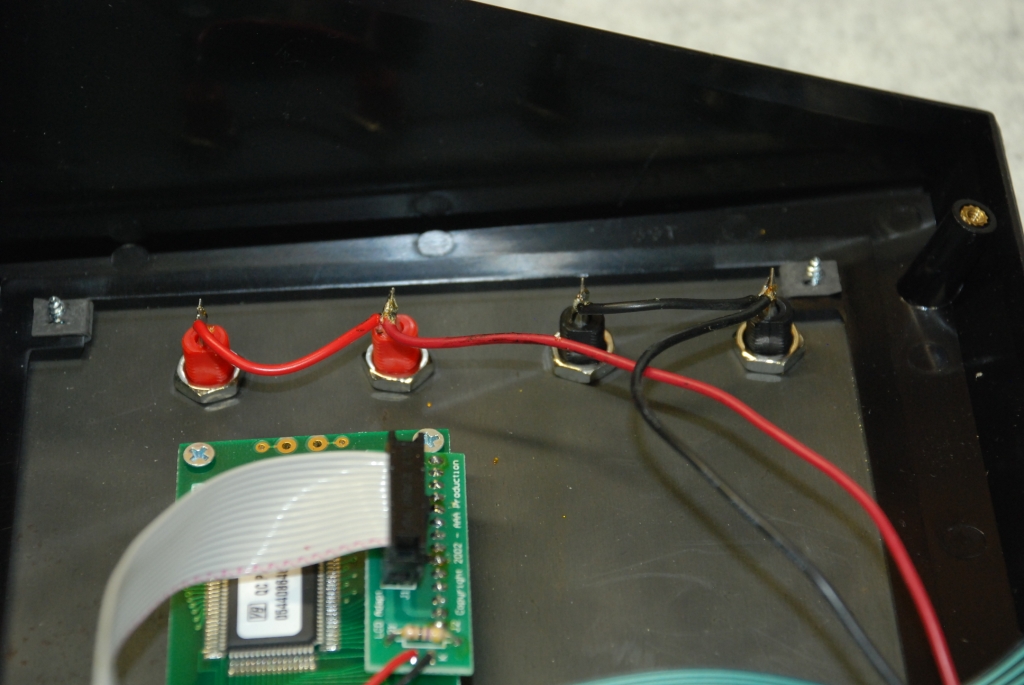
Now it's time to remove the old wires that connect to the handheld electrode jacks. You may unsolder the wires or just clip them off.
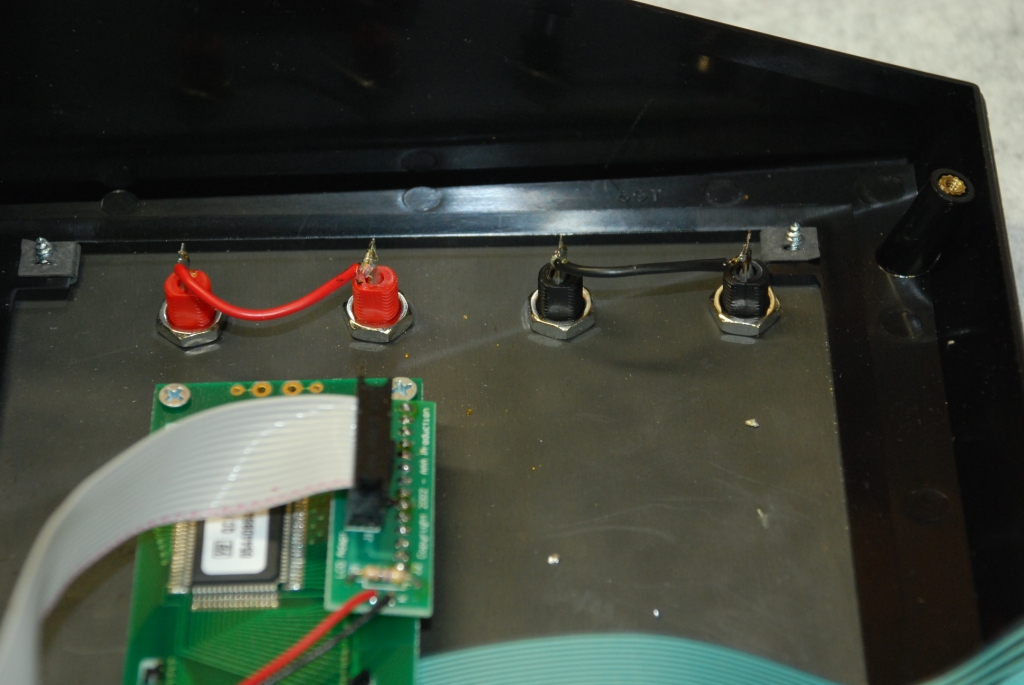
After the old wires are removed, things should look like this. Your GB-4000 may have bare jumper wires between the jacks; it makes no difference if the jumper wires are insulated or not.
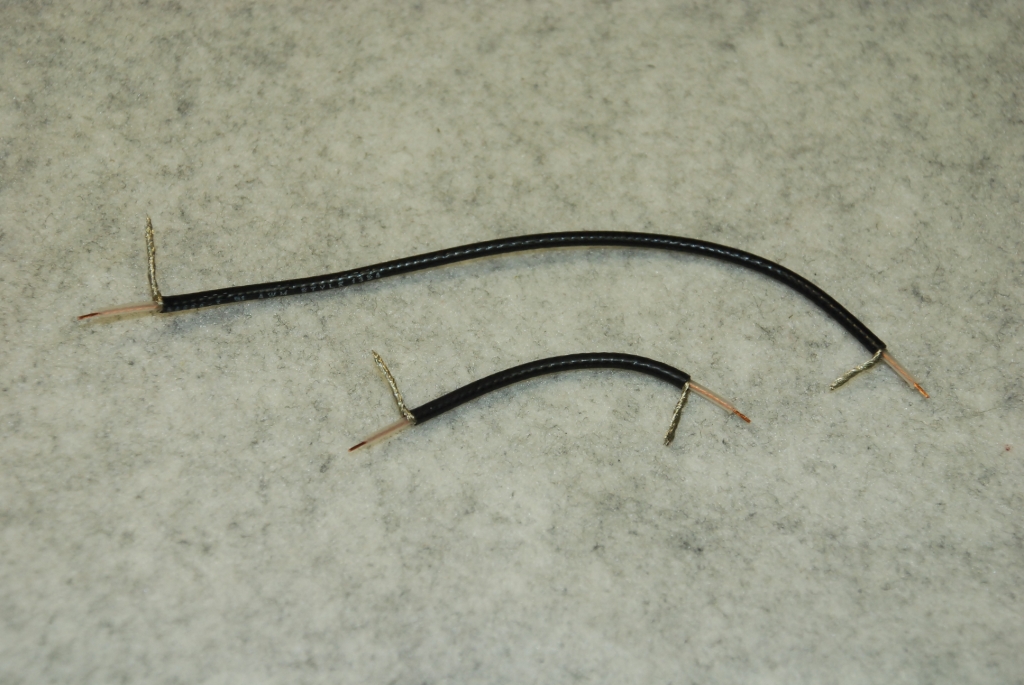
Now you need to prepare three length of small diameter shielded or coaxial cable. (Only two of the three required cables are shown here.)
I had some RG-174/U, coaxial cable on hand, so I used that, but any single conductor shielded wire will do just fine. Twist and position the shield braid at the ends of all three of the cables as shown. This orientation makes installation easier, since you will not have to twist the cables to get them to fit in place.
The following cable lengths are the cable BEFORE you strip and prepare the ends of the cables.
Cut the first cable to a length of 3 inches / 8 cm. This cable will connect the old BNC connector (for the MOPA) to the circuit board.
Cut the second cable to a length of 6 inches / 16 cm. This cable will connect the new BNC connector (for the PA2) to the circuit board.
Cut the third cable to a length of 10 inches / 25.4 cm. This cable will connect the red and black handheld electrode connectors to the circuit board.
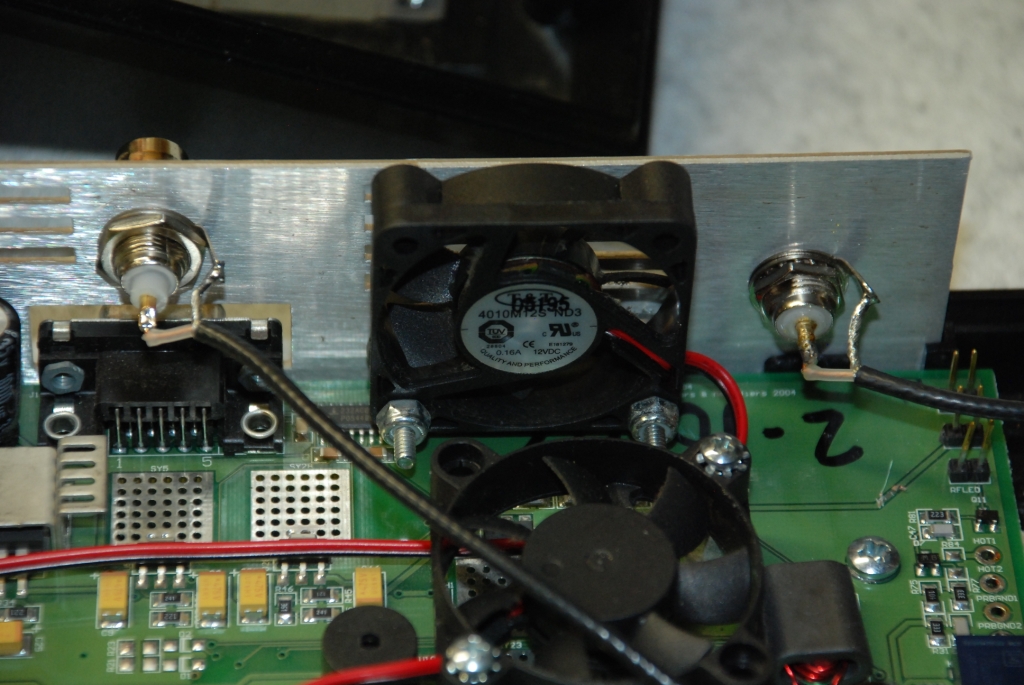
Solder one end of the 6" long cable to the new BNC jack seen here in the left side of the picture. This jack is for the PA2 only.
Solder one end of the 3" long cable to the old BNC jack seen here in the right side of the picture. This jack is for the MOPA only.
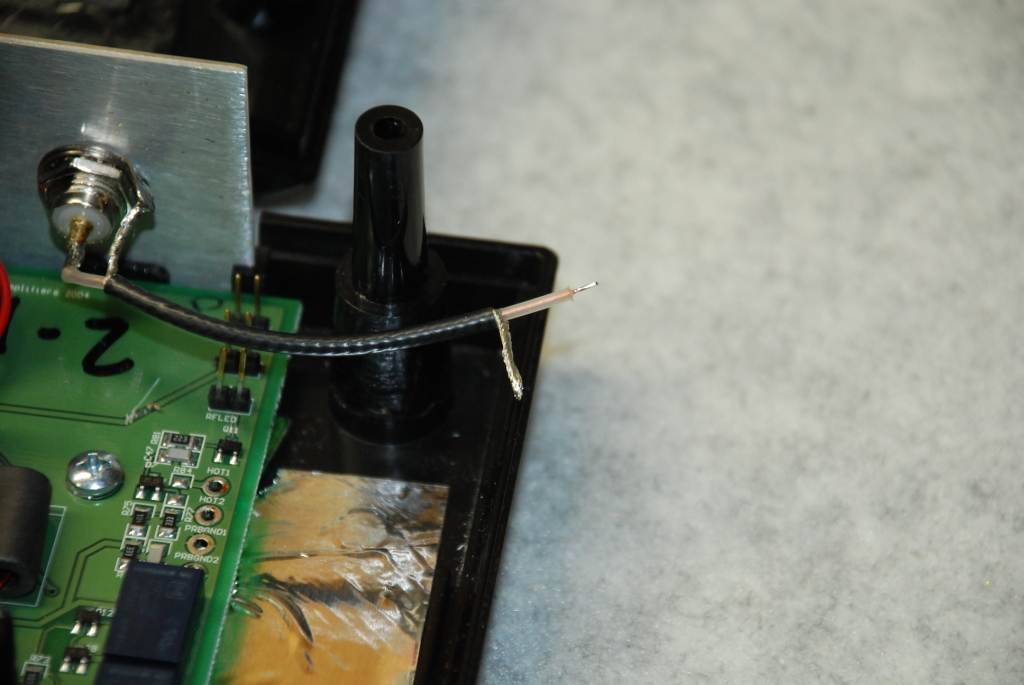
Now you should have one end of the 3" cable free, as shown here.
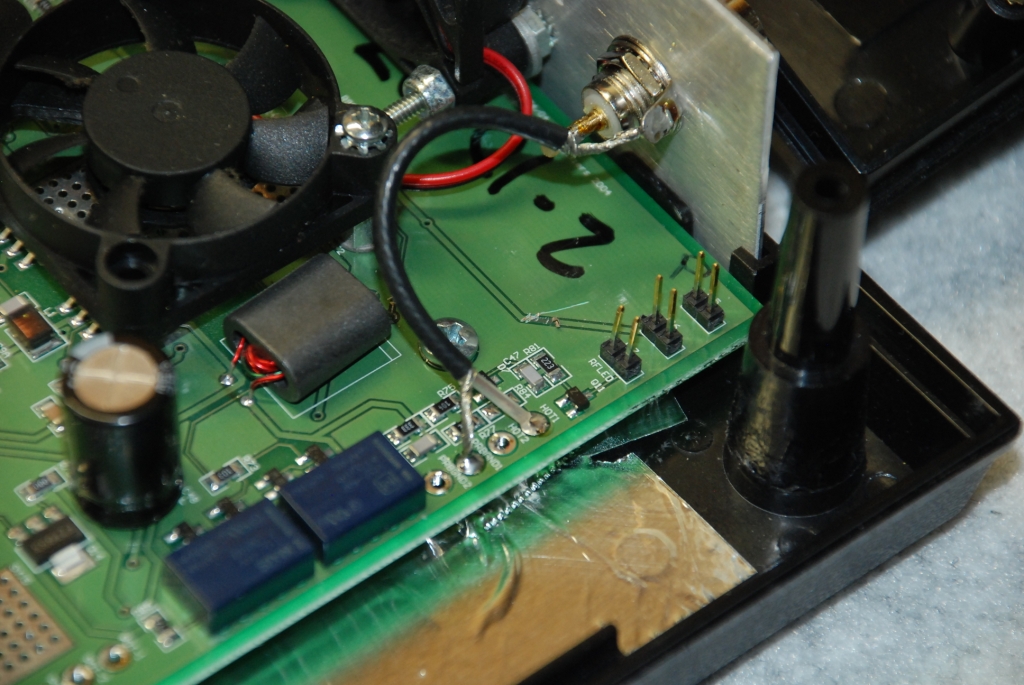
Solder the free end of the 3 inch long cable to the circuit board as shown here.
The center wire of the cable connects to the "HOT1" solder point. The shield of the cable connects to the "PBGRND1" solder point.
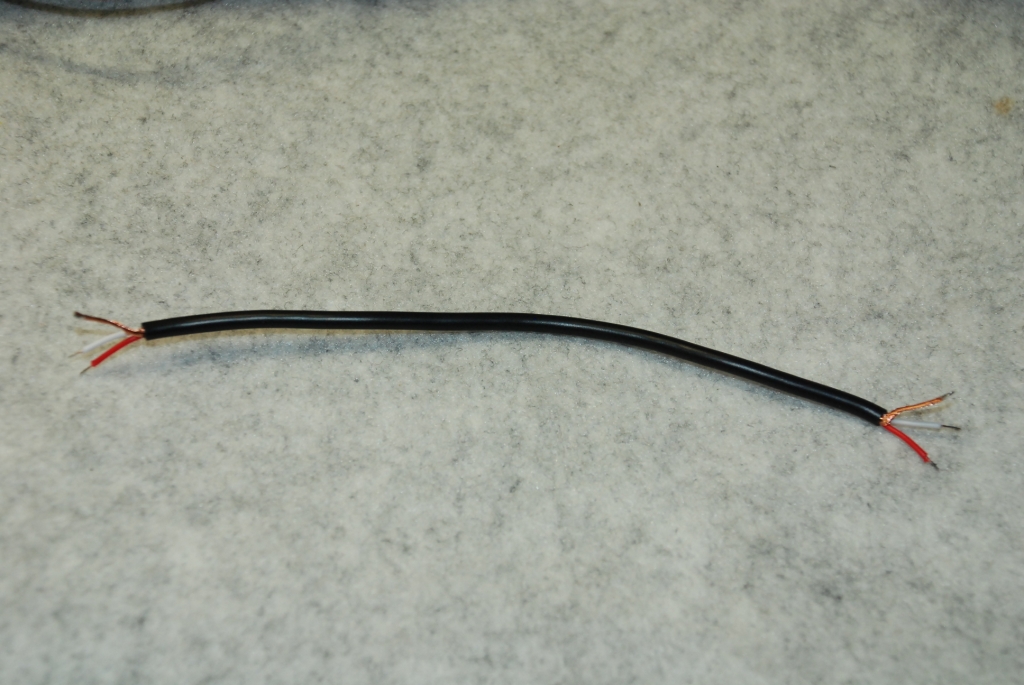
Now cut a 6" / 16 cm length of two conductor shielded audio cable. A suitable cable may be cut from a small diameter microphone extension cable. Prepare the ends of the wire as shown in the picture.
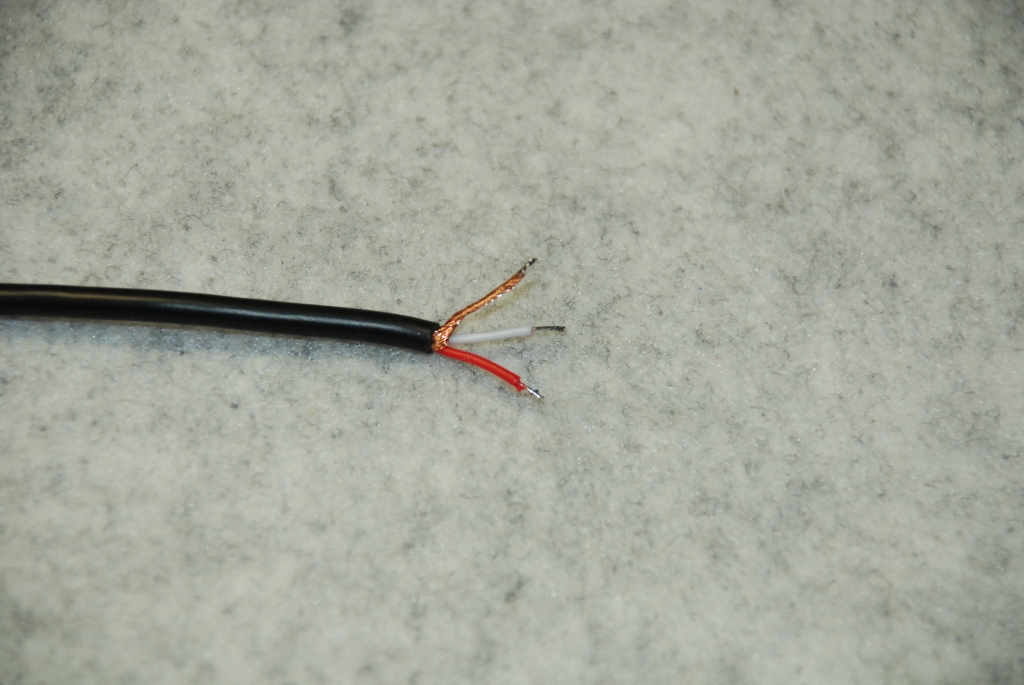
Prepare the ends of the wire like this.
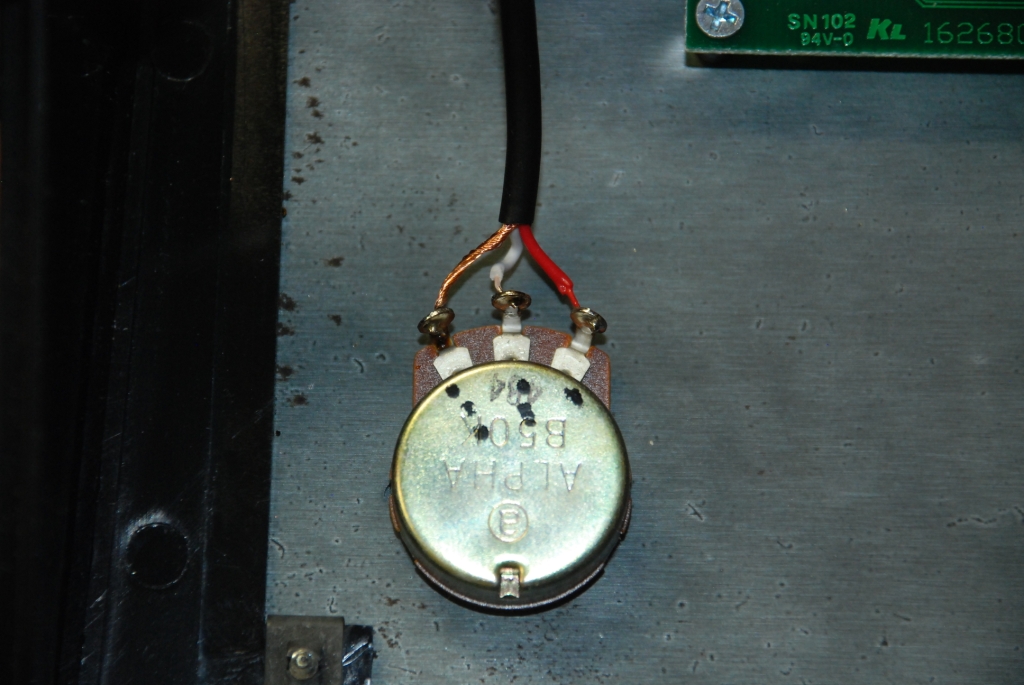
Connect and solder the two conductor shielded wire to the OUTPUT LEVEL potentiometer as shown. The shield wire MUST connect to the potentiometer terminal as show for it to work correctly.
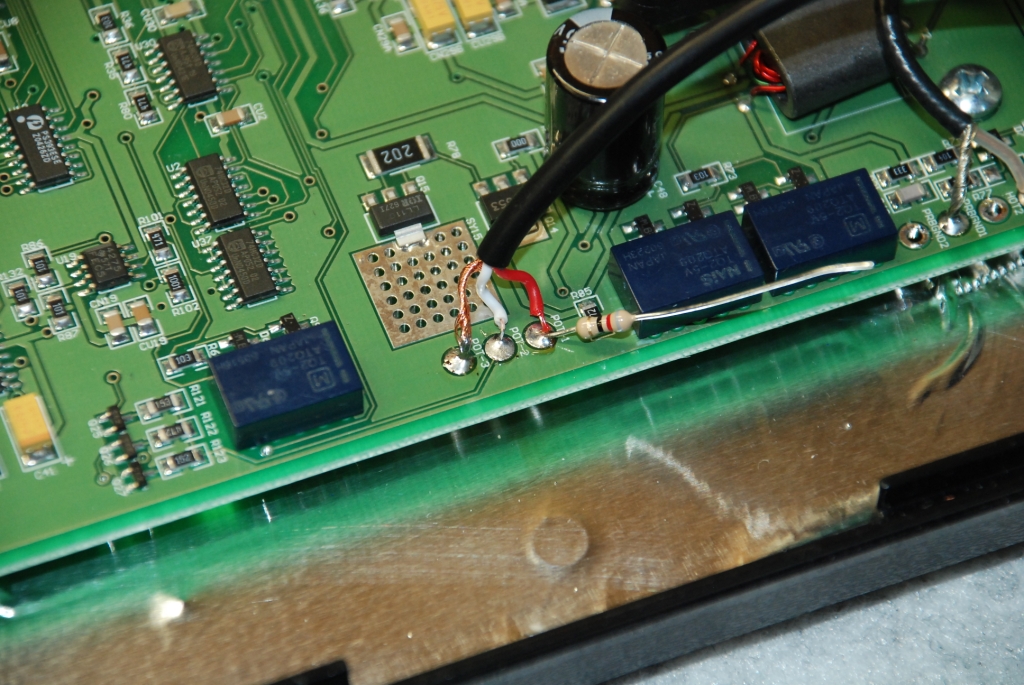
Now it gets a little bit more complicated , so I suggest you look at this photo and the next four pictures before you connect anything more.
Follow the color code of your particular shielded cable to make sure the correct wires go to the proper connection points. Solder the two conductor shielded wire to the circuit board as shown.
The shield will connect to the solder point on the circuit board marked "POT-3."
The wiper (center connection) of the potentiometer must connect to the "POT-2" solder point, and the "hot" end of the potentiometer (the terminal furthest from the shield wire) must connect to the "POT-1" solder point. Be sure to insert one end of a 1/4 watt 82 Ohm resistor into the "POT-1" solder point along with the wire before you solder the wire to the circuit board. Position the resistor as shown in the picture. After soldering the resistor and wires in place, make sure the end of the resistor that passes through the circuit board does not contact the aluminium shield under the circuit board.
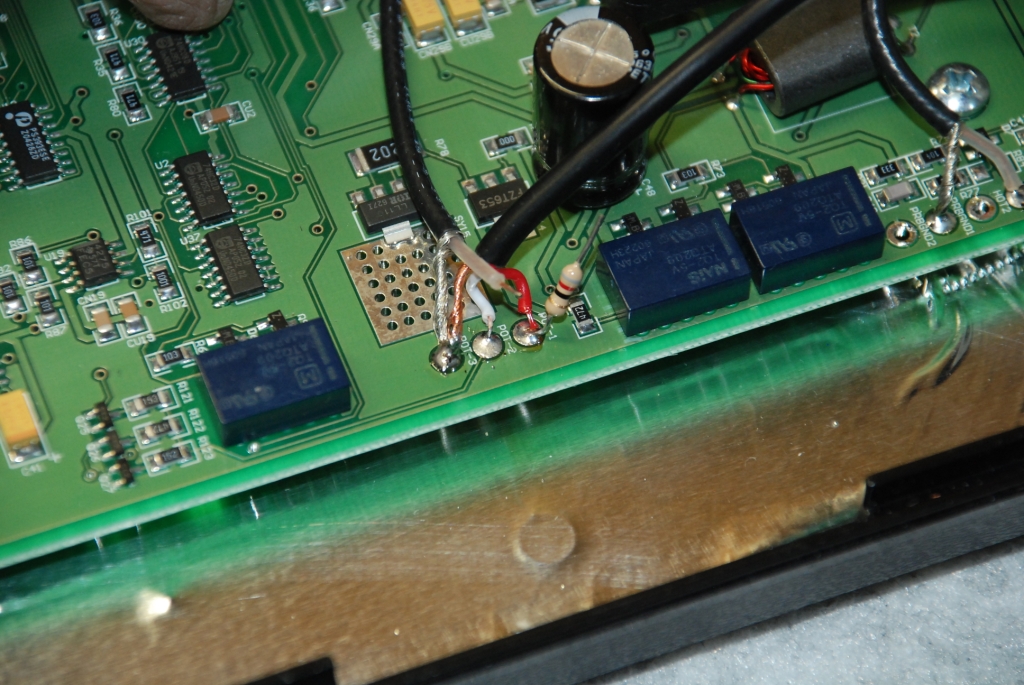
Now, take the free end of the shielded wire that comes from the new BNC connector and solder it in place.
Connect the shield wire to the "POT-3" solder point. It is OK to "tack solder" the shield wire to the circuit board if you have already soldered the shield from the other cable in place.
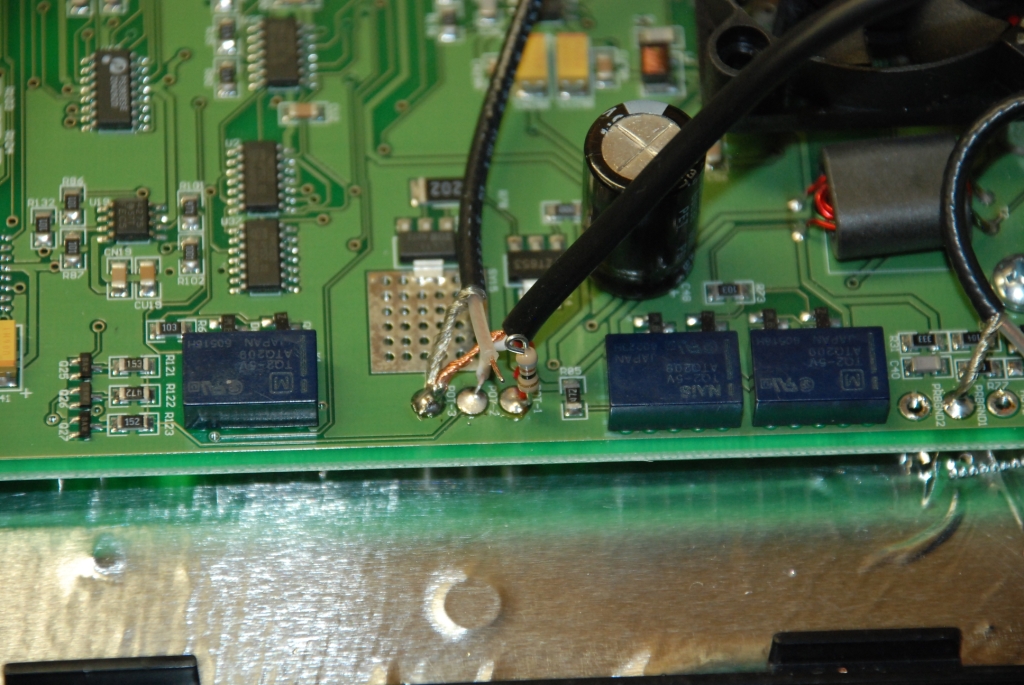
Take the free wire of the 82 Ohm resistor and cut it to a length of about 1/2" / 12.5 mm and bend the free end of the wire into a tight loop.
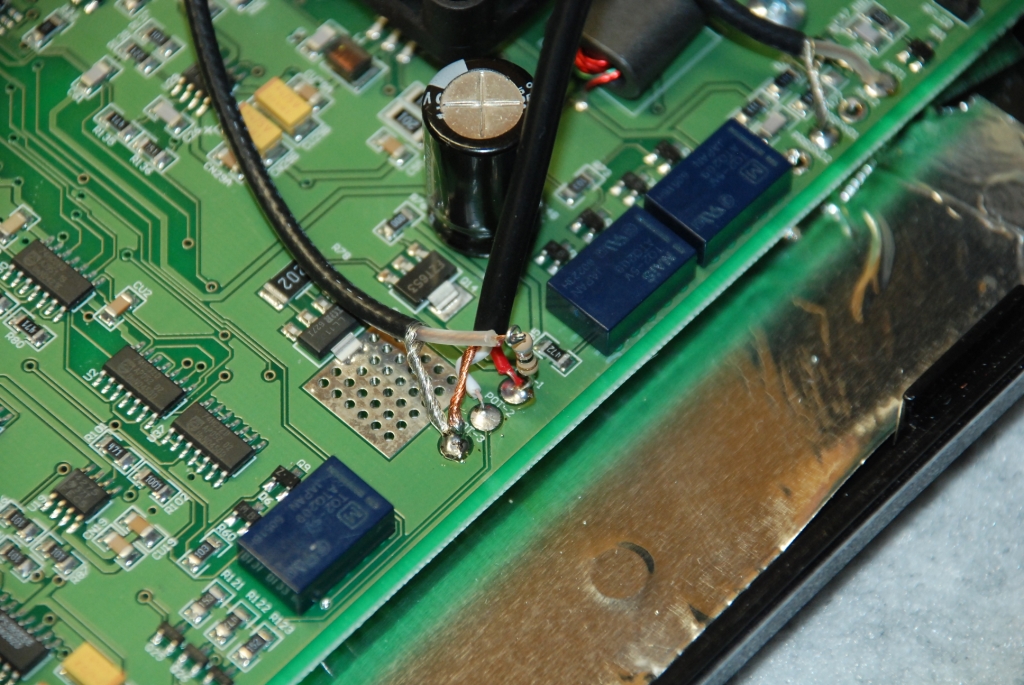
Pass the center wire of the shielded cable from the new BNC jack through the loop in the wire from the 82 Ohm resistor.
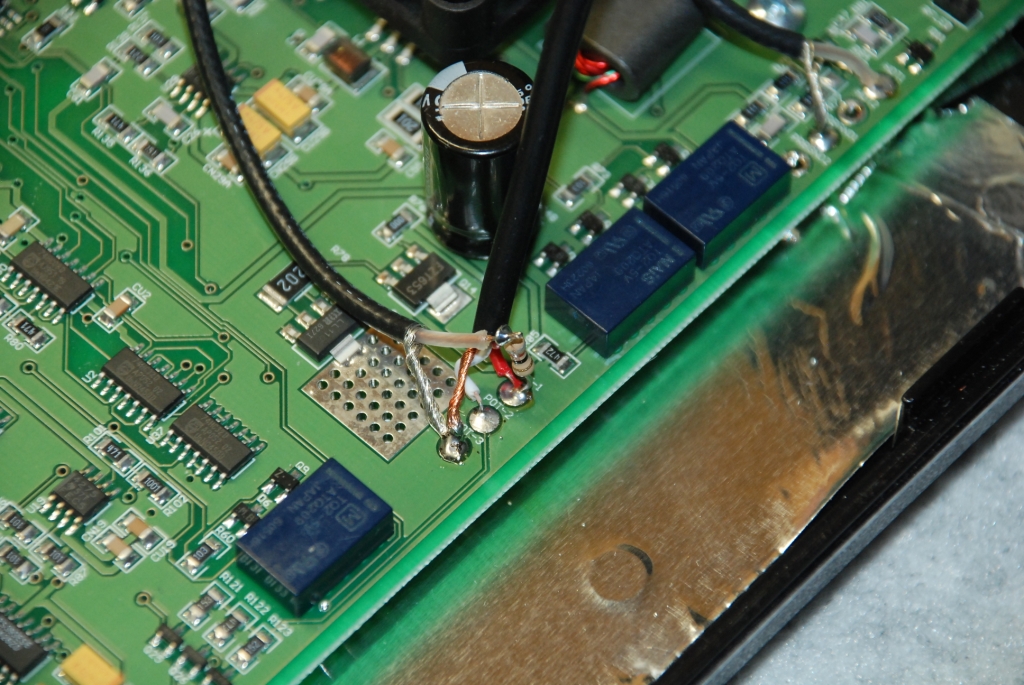
Solder the wire to the resistor.
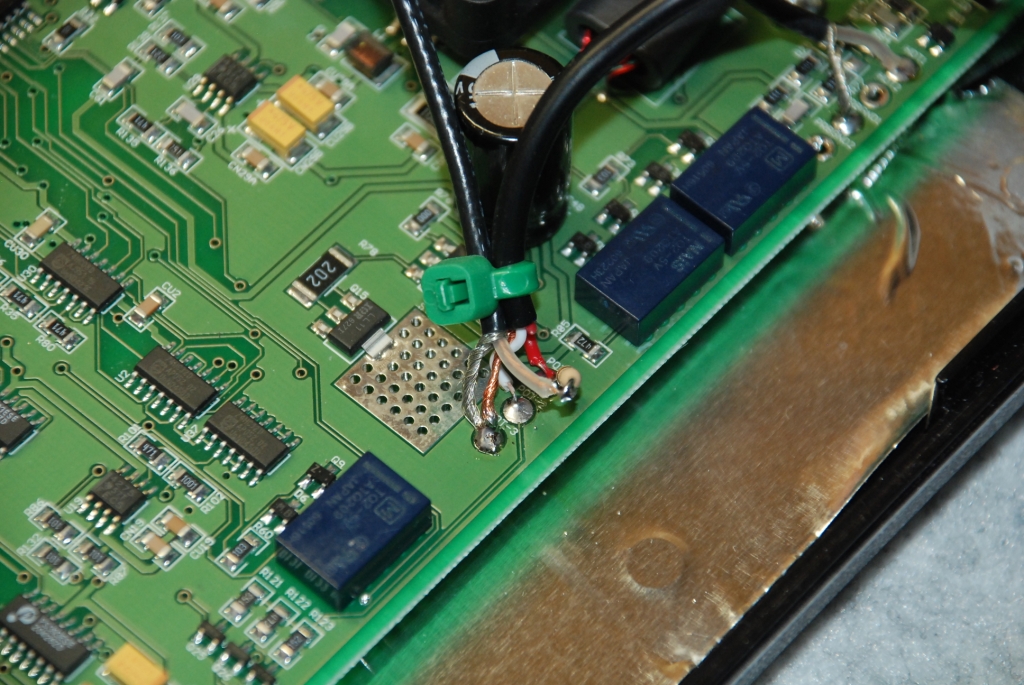
Use a small plastic tie to hold the cables together to prevent any movement or vibration from breaking the resistor free from the circuit board.
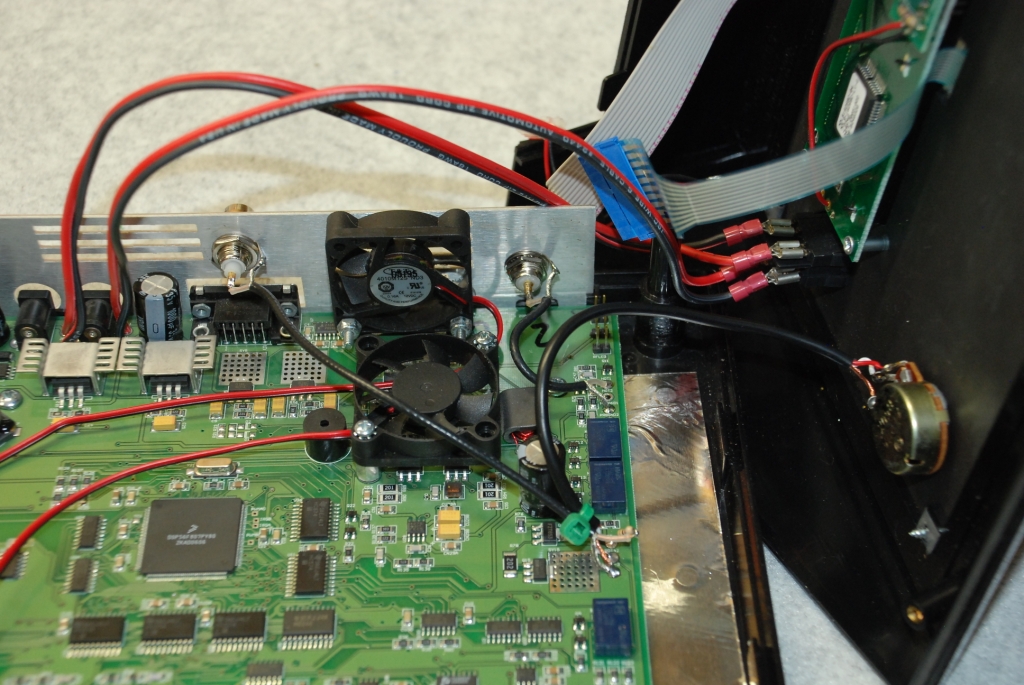
After all the solder smoke clears, this is what things should look like inside your GB-4000. The shielded cables are now in place for the potentiometer, the old MOPA jack and the new PA2 jack. Yet to be installed is the shielded cable to the front panel handheld electrode jacks
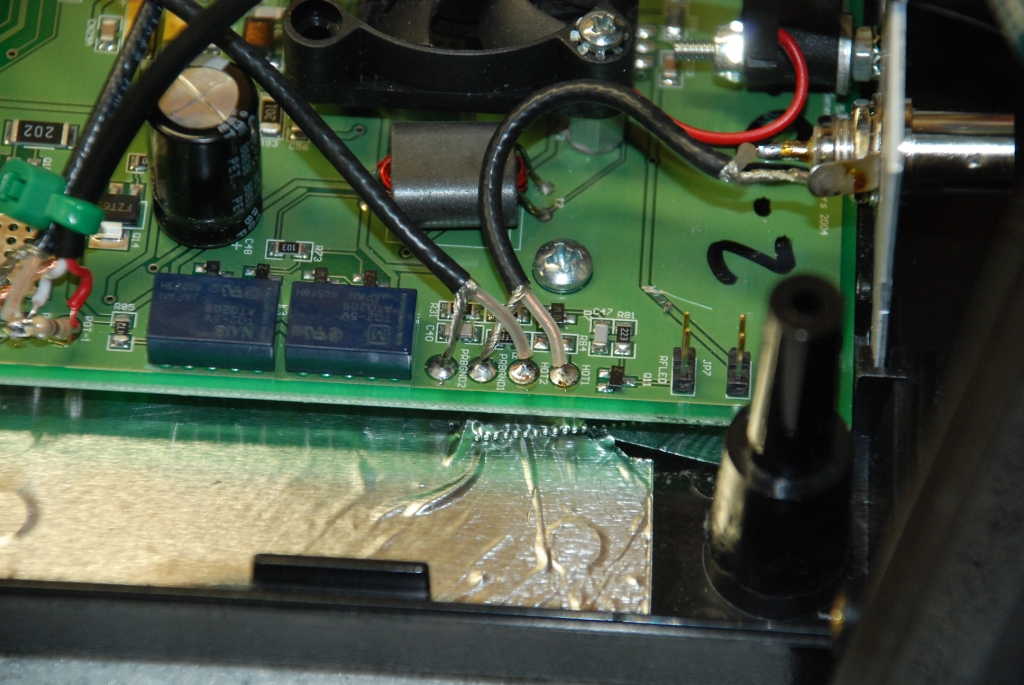
Take the 10" / 25.4 cm length of shielded cable and solder one end of the cable to the circuit board as shown here.
The center wire of the shielded cable connects to the "HOT2" solder point, and the shield connects to the "PBGRND2" solder point.
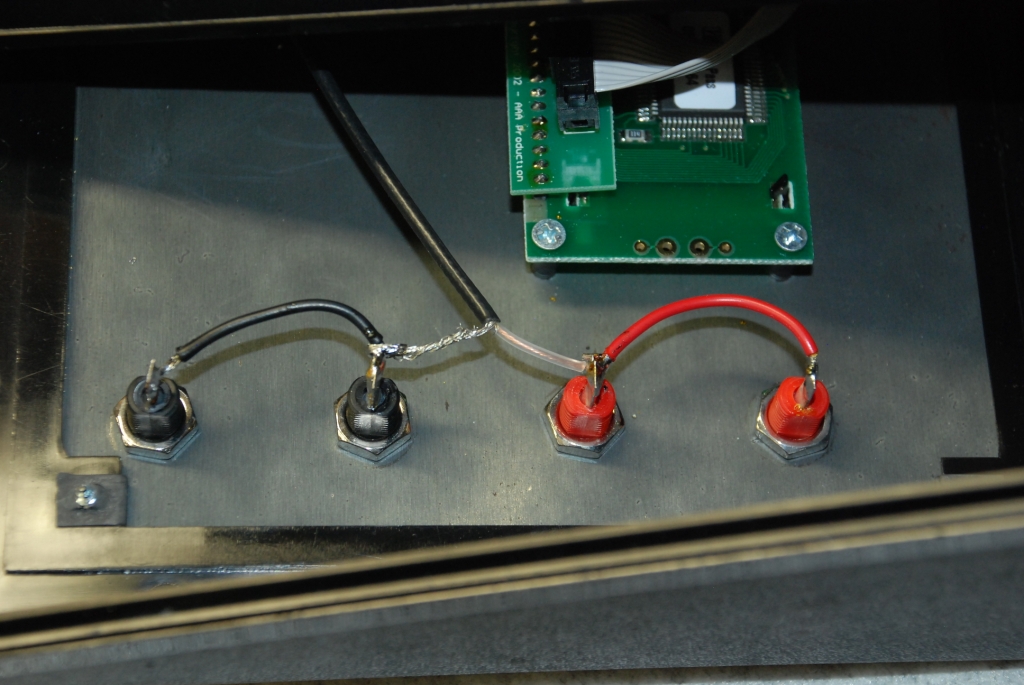
Connect the other end of the shielded cable to the handheld electrode jacks as shown here.
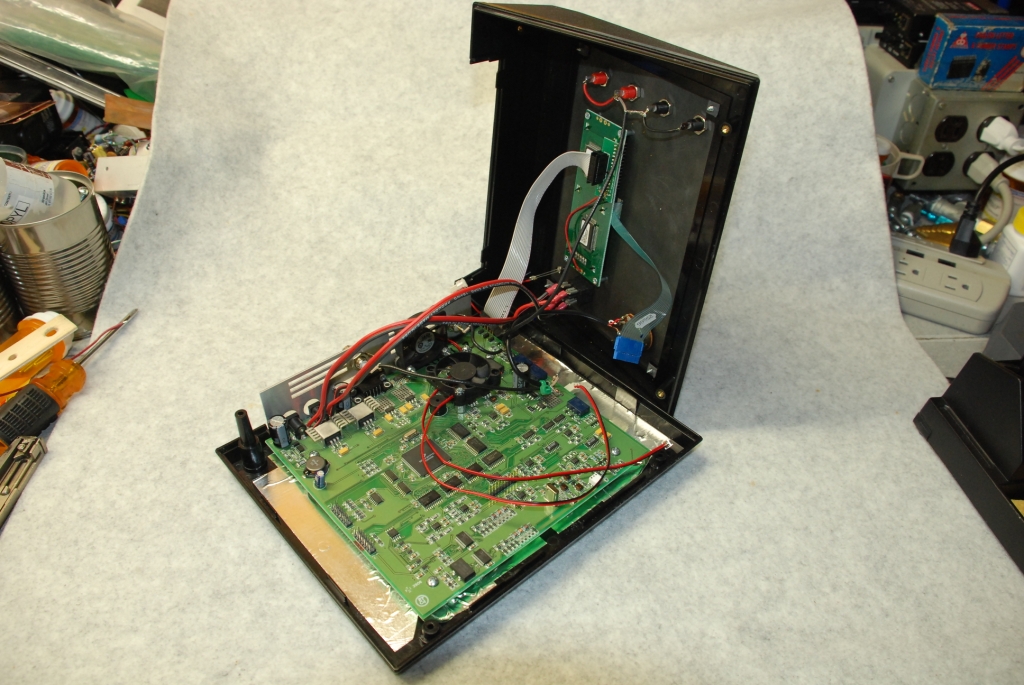
Now the interior should look like this picture. (Ignore the messy workbench - please!)
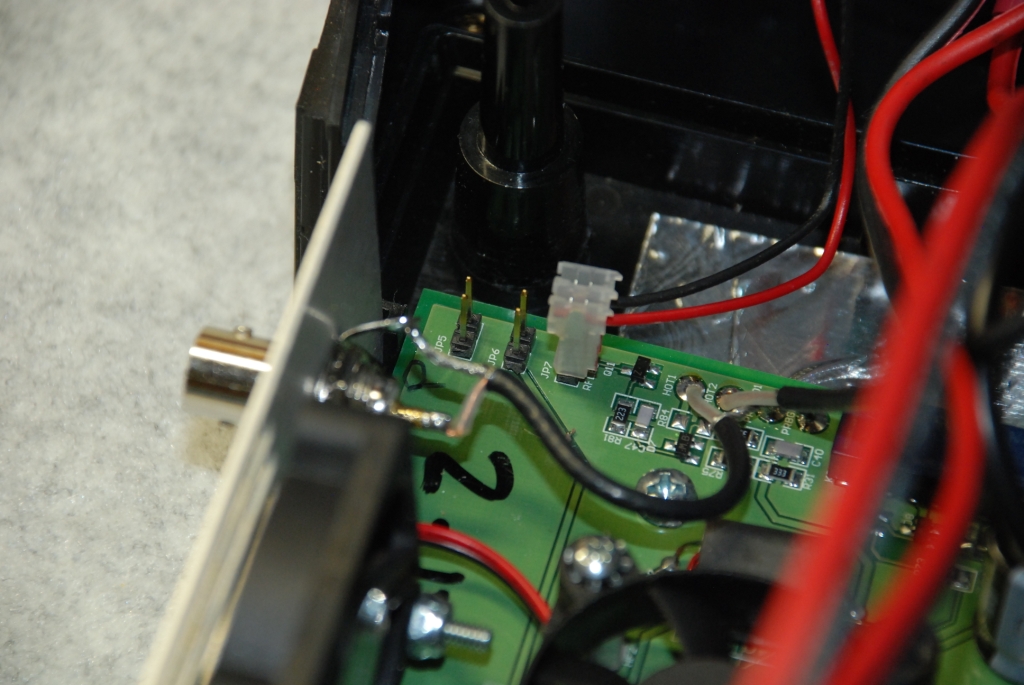
Now it's time to reconnect the connectors for the cooling fans and the RF indicator LED.
The first connector is for the LED. Remember not to short circuit the LED wires.
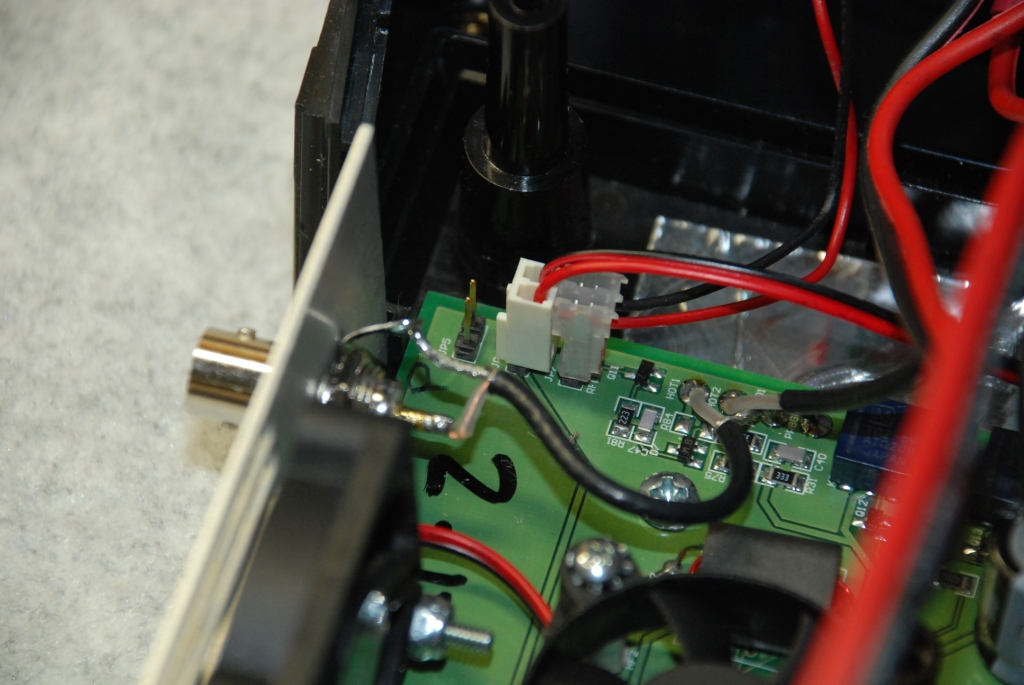
The second connector is for the rear panel fan.
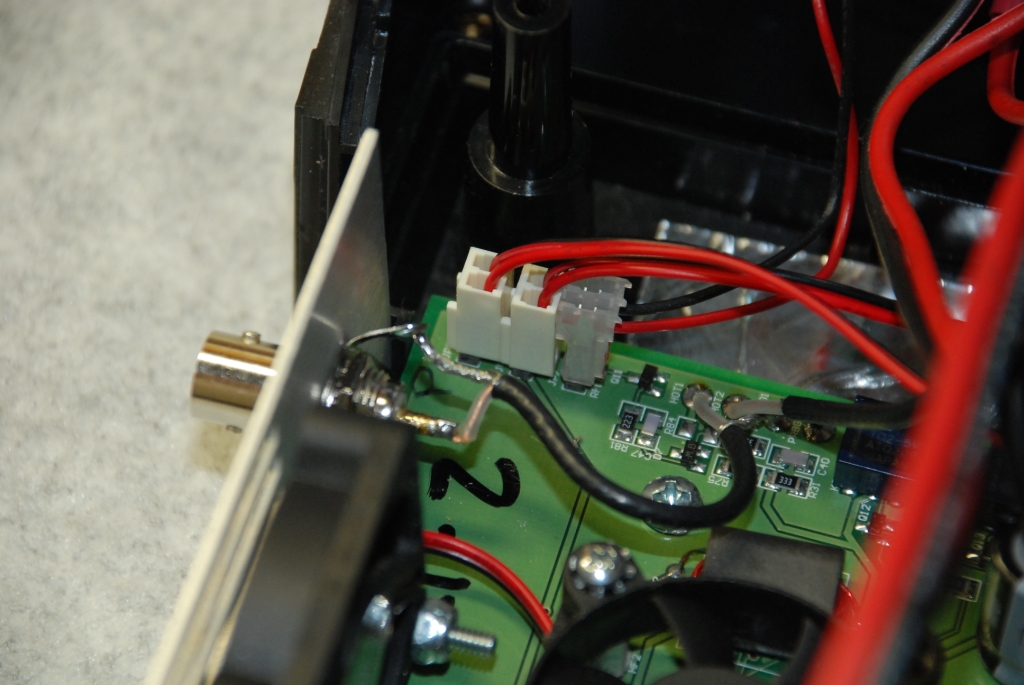
And the third connector is for the circuit board cooling fan.
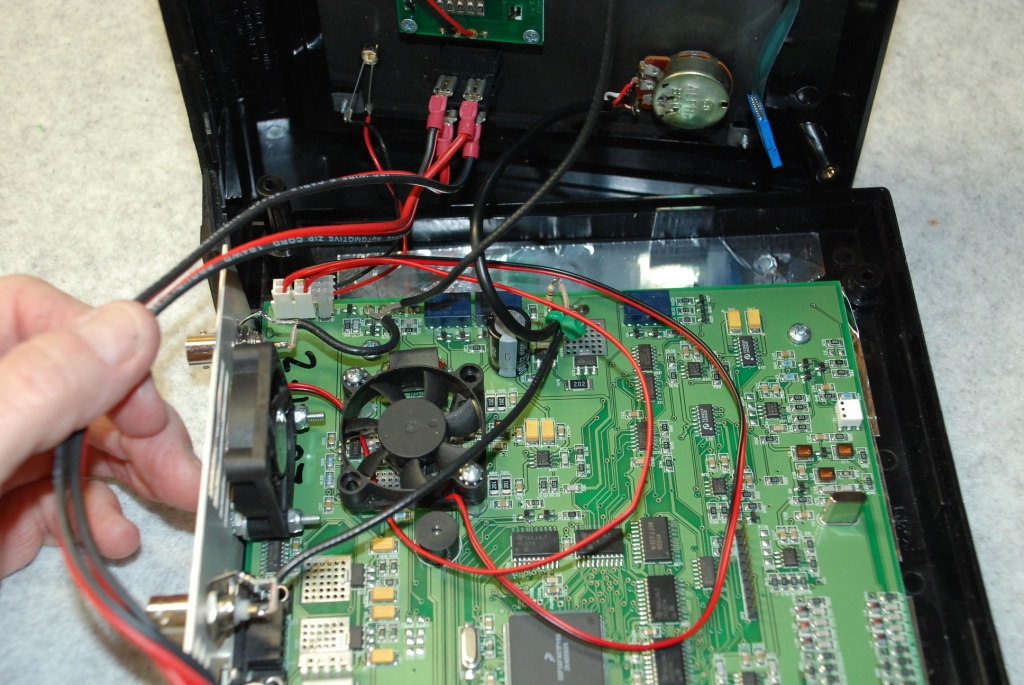
Here is the correct placement for the cooling fan wires.
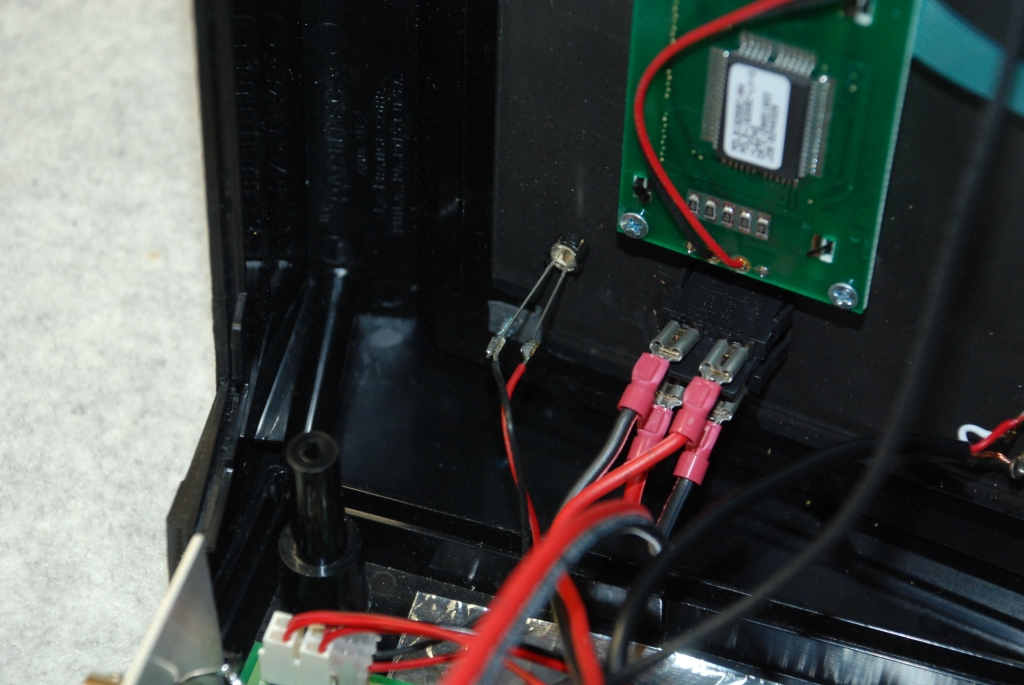
Watch those LED wires!
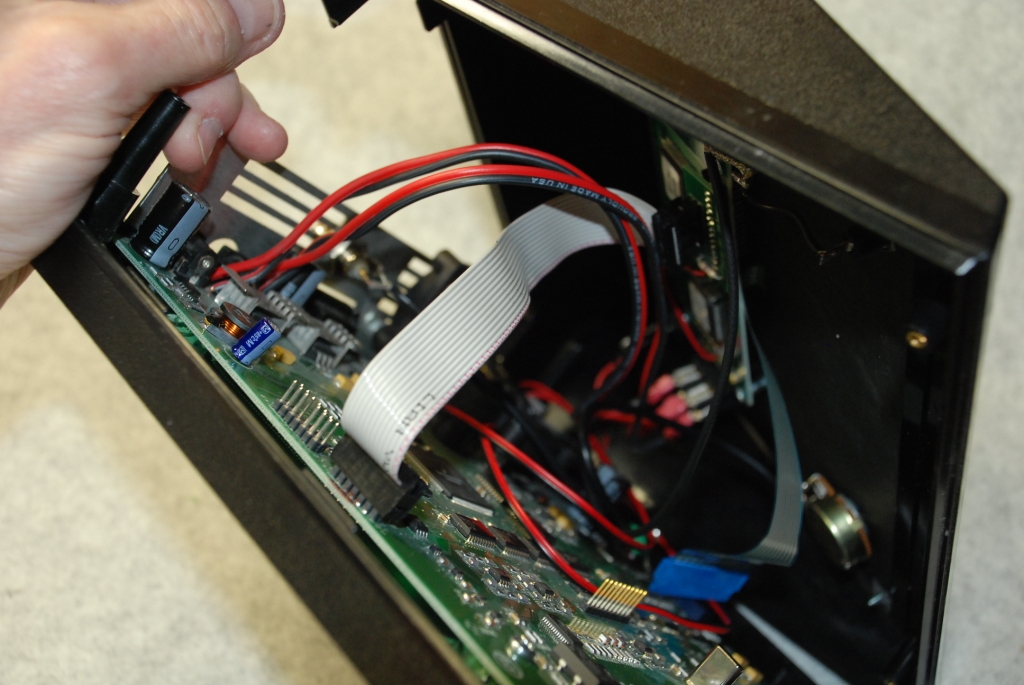
Now it's time to reassemble the GB-4000 in its case.
Make sure the rear panel is fully seated in the lower half of the case. Then position the top of the case as shown and carefully connect the gray data cable on the proper connector on the main circuit board. Remember the proper connector is the one that is closest to the FRONT edge of the circuit board.
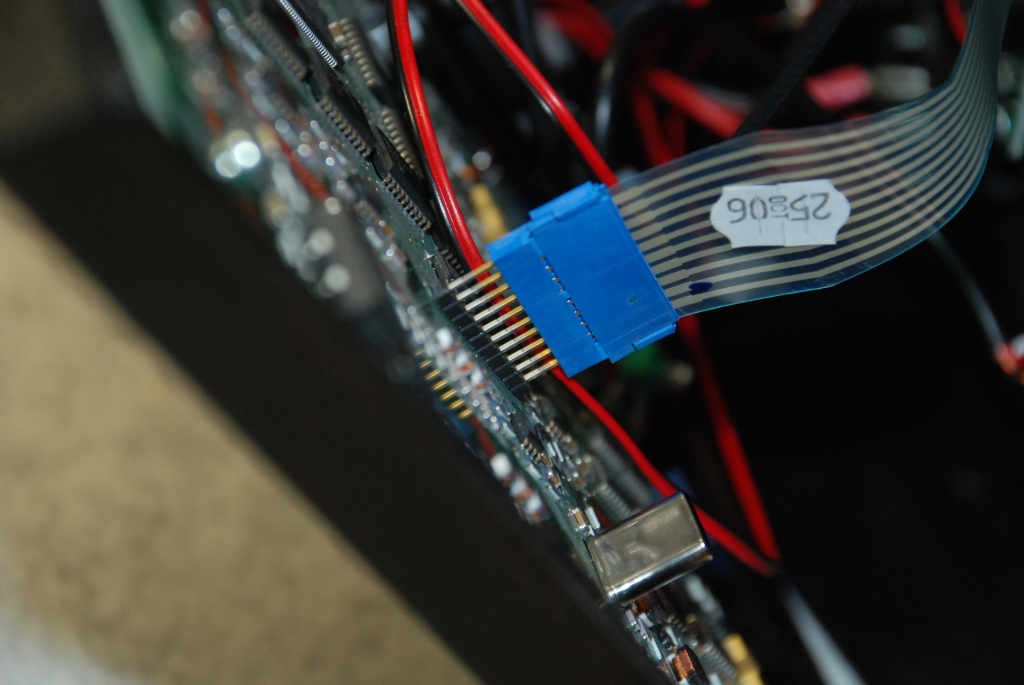
Position the keyboard cable on the circuit board connector pins in preparation for pressing it in place.
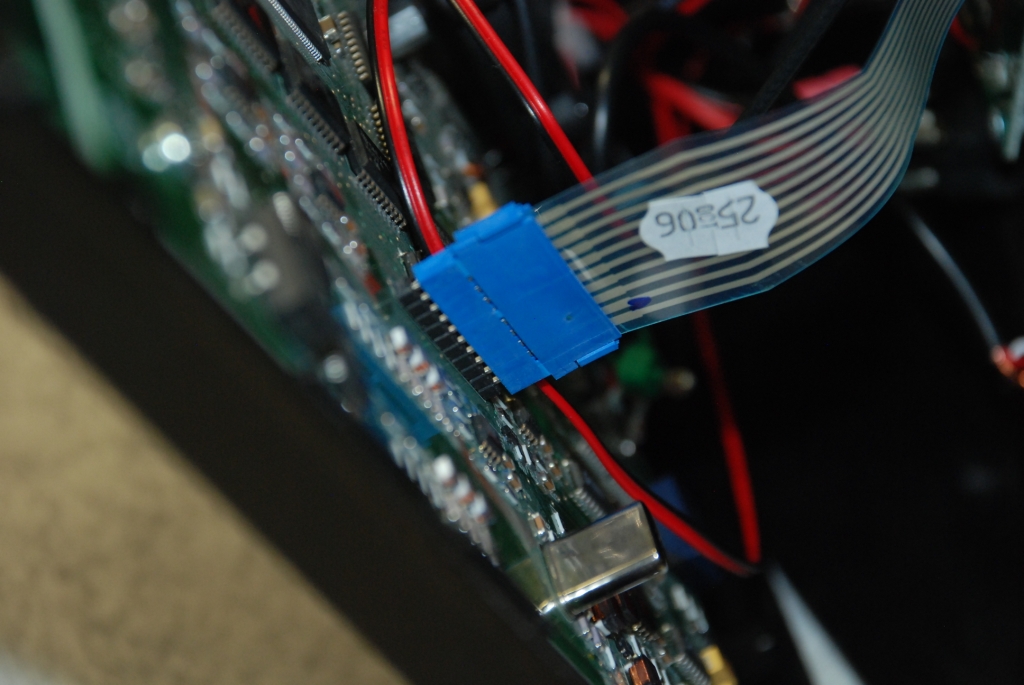
Line up the connector squarely on the pins and press the connector straight down against the board as shown. Watch the cable - it's fragile! Handle the connector by the edges or sides only. Avoid bending the cable excessively or creasing it to avoid damage.
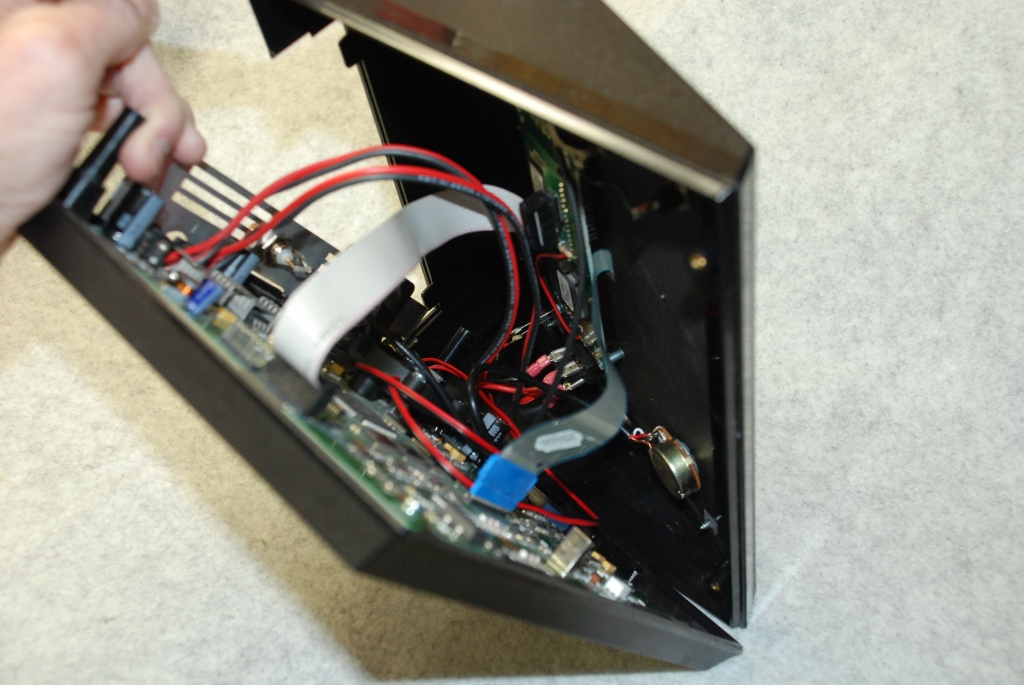
Is everything in place? No tangled or unconnected wires? If everything looks correct, carefully close the case, watching through the gap between the case halves to make sure everything stays where it should be.
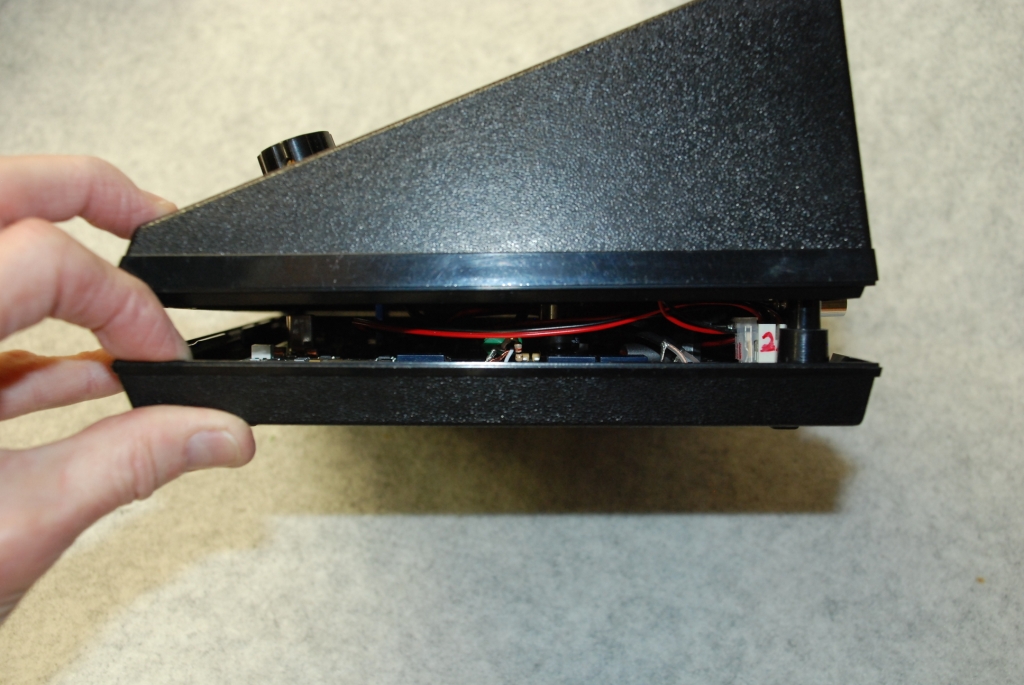
Check from the right side of the case to make sure no wires are pinched.
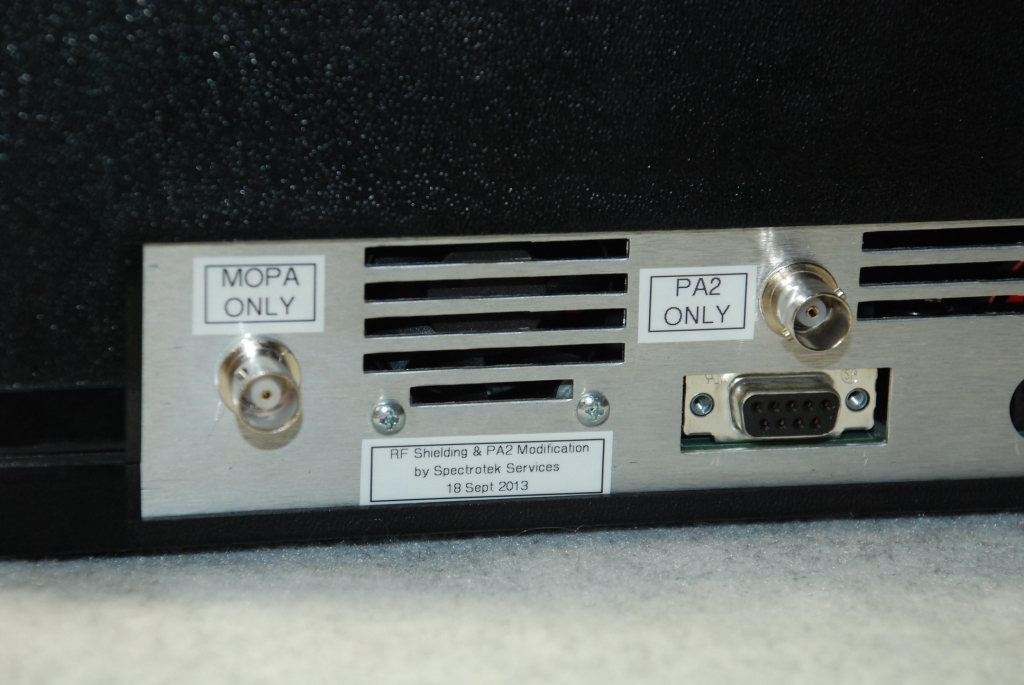
You should mark the rear of the instrument to inform users that the shielding and PA2 drive modifications have been performed. Labelling the BNC jacks is also a good idea to avoid connecting to the wrong jack during operation.
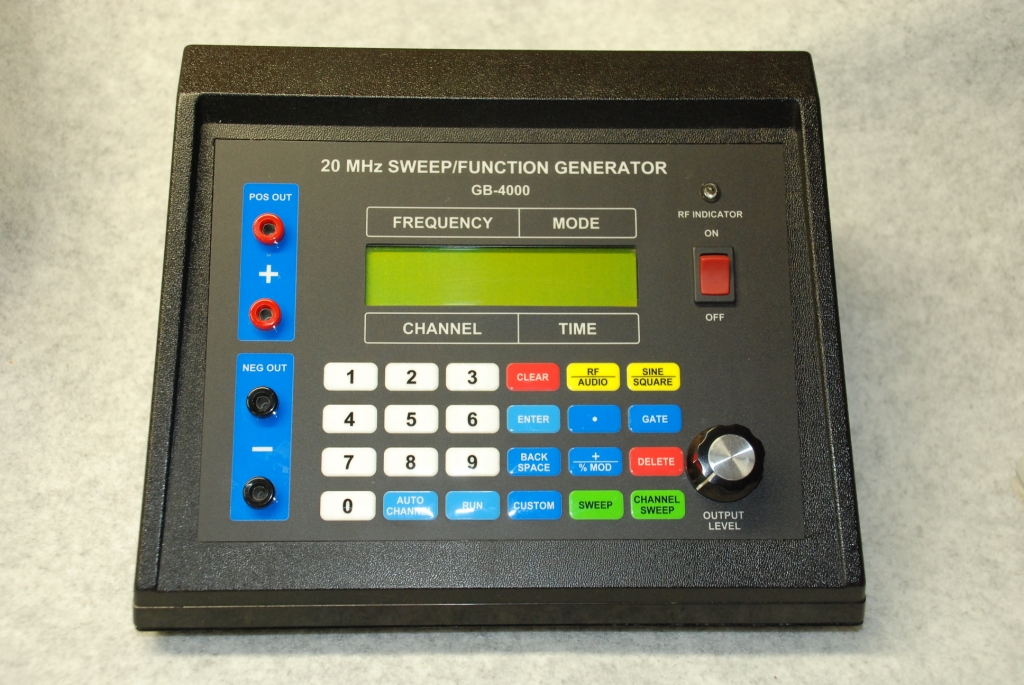
Well, here we are, all RF shielded, modified, and reassembled. Except for the rear panel labels, there is no evidence of the modifications.
Remember that the PA2 will only work properly when it is connected to the PA2 jack, and the MOPA will only work properly when it is connected to the original MOPA jack.
After these modifications, there is NO CHANGE in the operation of the GB-4000 for the functions and uses for which the instrument was originally designed.
Prepare the GB-4000 for use by making the following adjustment to the settings of the instrument. These settings should not be changed when running frequencies and sets, except for the GATE and DUTY CYCLE settings which may be adjusted as required.
SINE / SQUARE = set to SQUARE
RF / AUDIO = set to RF MODE
DUTY CYCLE ("." Button) = set to 50% (May be adjusted as required.)
+ / % MOD = set to 100
GATE = OFF (May be adjusted as required.)
Connect the input of the PA2 amplifier to the new BNC connector on the rear of the GB-4000.
Please note that the RF gain control has no effect whatever on the output from this additional coaxial connector, so it doesn't matter where you have the RF gain control set when you are using the PA2 amplifier with the GB-4000.
Important Note - When the GB-4000 is first turned on, it generates a single long pulse output that may damage the MOSFET in the PA2 amplifier if the PA2 is powered up at that time. To prevent possible MOSFET damage, please follow the turn-on and turn-off procedure shown below.
This web site and all contents including pictures, text and diagrams is Copyright © 2013 - 2014 by Ralph M Hartwell.